


More than ever before, iPhone users now enjoy capturing amazing photos with their phones, thanks to the regular updates and the release of new set of iPhones. Whether you are going on that special vacation or just having a nice time out with your family, you can be sure of getting those amazing moments captured on your phone. However, one challenge that comes with this is being able to keep all those favorite photos and videos on your phone.
Having many photos on your iPhone can shrink up your storage space and have a toll on the efficient running of your phone. That is why you need to find a means of transferring your photos from your phone to your computer. While iTunes has been an excellent tool for this purpose, it can be pretty difficult for new iPhone users, not to mention its numerous flaws and updates that can make the job difficult for anyone.
But recently, there have been some excellent iPhone managers like the iMobie AnyTrans that is making the process as hassle-free as possible. They allow you to preserve the space on your phone by transferring your photos to your computer without any stress.
If you have been looking everywhere for a quick and easy way to transfer iPhone photos to computer, here are a few iTunes alternatives to help you get the job done. I will also show you how you can use AnyTrans for iOS, which is considered the best at the moment.
But before that, let’s help some new members of the iPhone family see some of the reasons they need to consider moving their photos off their phones to their computer.
Why Do You Need to Transfer Your Photos from Your iPhone to Your Computer?
- To Make A Photo Backup
This is definitely the major reason you need to make the transfer – to regularly make a photo backup on your computer. It can be very painful losing some photos because some moments only come but once. That is why you need to have a backup on your PC. Even if something eventually happens to your iPhone in the future, you will definitely not be losing your favorite photos.
- To Free Up Space On Your Phone
The more photos you have on your phone, the less storage space you have, and this could cause your phone to start hanging or malfunctioning. But transferring your photos to your computer can help prevent that from happening.
- To Better Edit And Touch Your Photos
If you are an iPhoneographer, you will definitely agree that one of the best ways to edit your images is to do it on a larger screen like that of a PC. So when you transfer your photos to your computer, you will have a better option to take your editing to the next level and come back with more stunning photos.
Some Good Options for Transferring Your Photos to Your Computer
- Using photos app
This is a very easy-to-use iTunes alternative for transferring photos from iPhone to computer. You can use it to transfer to both Mac and Windows computers. It is even easier if you have ever tried the option on your computer before. You just need to connect your iPhone to your computer and the photo app will automatically detect it. From there, you can now select the photos you want to transfer and click “Import Selected”.
- Using windows or file explorer
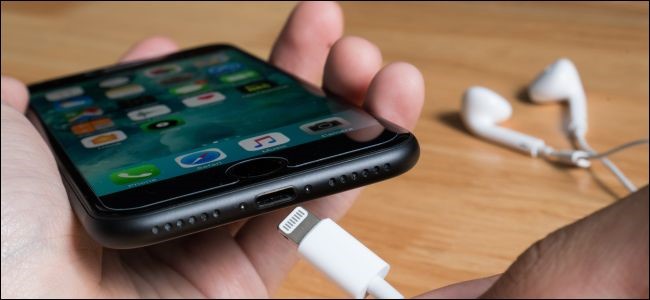
Here, you also need only your Lightning-to-USB cable to connect your phone to your computer and import your images. That is the same cable used for charging the phone. With it, you will be able to access your phone on your PC. Locate the 100APPLE folder from there you can choose the photos you want to transfer.
- Using iCloud Photos Library
This is a good option if you don’t want to use a cable to connect your iPhone to your computer. This option allows you to use online photo synchronization services. That means you will not only be uploading your photos to the cloud, you will also have the photos downloaded to your computer. In the end, you will be having copies of your favorite photos both on your computer and also in online storage.
While all these are great options for having your photos transferred from your iPhone to your computer, more and more iPhone users are sharing testimony about iMobie AnyTrans and how easy and fast it makes the process.
So I have decided to pull up this post to help more people know about this amazing iPhone manager and how they can use it to seamlessly transfer their images to their computers.

AnyTrans for iOS; The Easy and Quick Option for transferring iPhone Photos to Computer
AnyTrans for iOs is a professional iPhone manager that specializes in helping iPhone users transfer, back up, and manage all their phone content from one handy place. It is quick and very easy to use. In less than 3 minutes, you can transfer as much as 1500 high-quality images to your computer.
It is compatible with both Mac and Windows computers. One interesting feature that has made most iPhone users favorite this software is that it doesn’t only allow you to transfer your photos, but also help you arrange them into categories. That is one feature you can’t see with iTunes and some other iPhone managers out there on the market.
If you have been looking everywhere for a one-in-all tool to help manage and transfer your photos to your computer, AnyTrans for iOS is simply your best shot. Before I tell you how to use it, here are some unique features that make the iPhone manager stands out from others.
Amazing Features of AnyTrans for iOS
- Easy and quick transfer: the software comes with an automated one-click technology that allows you to transfer an entire album from your phone to your computer without wasting any precious time. You can also selectively transfer your favorite photos if that is what you want.
- Complete Backup manager: Apart from being simple and easy to use, AnyTrans is a complete iPhone manager that will also help arrange and organize the photos into different categories.
- Preserves quality: AnyTrans for iOS will not only transfer your photos to your computer but will also ensure their quality remains intact. There will be no compression or thumbnail copies.
- No Apple ID needed: AnyTrans for iOS is available for both Mac and Windows computers. So if you don’t want to sign to iCloud service with your Apple ID in order to transfer your photos from your phone to your computer, this is just the best option for you.
- Online HEIC converter: when you use AnyTrans, it automatically converts your HEIC photos to JPG formats during the transfer which hence makes those photos accessible on your computer.
- Phone switcher: have you just gotten a new iPhone and you want to migrate all your files and data from your former phone to the new, AnyTrans will help you do this without stress.
- Media downloader: if you are the type that loves to stream videos or listen to songs online, you will enjoy this unique feature of AnyTrans for iOS. It allows you to download your favorite audio and videos from such sites as YouTube, SoundCloud, Vimeo, and more than 100 other popular websites.
How to Transfer iPhone Photos to Computer Using AnyTrans for iOS
In a few simple steps, you can get all your lovely and beautiful photos transferred from your iPhone to your computer. Below are the simple steps to follow:
Step #1: Download and install AnyTrans for iOS
This is the first step. Look for the AnyTrans iPhone manager software and install it. Look for the latest version and install. When the software is done installing, run the app and proceed to the next step.
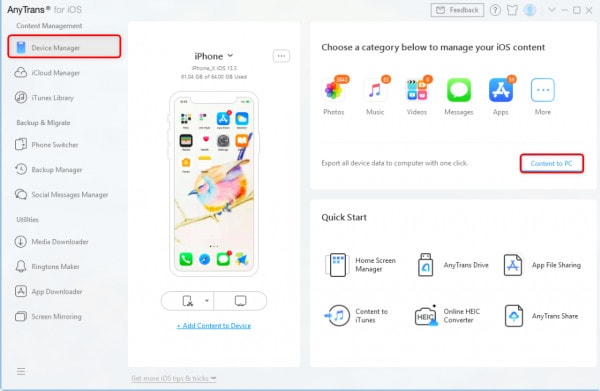

Step #2: Launch and Connect to your iPhone
Open the App Store on your iPhone and look for AnyTrans and install it. When the installation is complete, launch the app on your phone and also on your PC. Then connect both your iPhone and your computer via a USB connector. Then click “Content to PC” on the AnyTrans home screen on your phone.
Step #3: Select photos by categories
Now that you have connected the two devices, select the photos you want to transfer. You can either select individually or select by category. This may be Albums, My Photos, or anything you saved there on your phone.
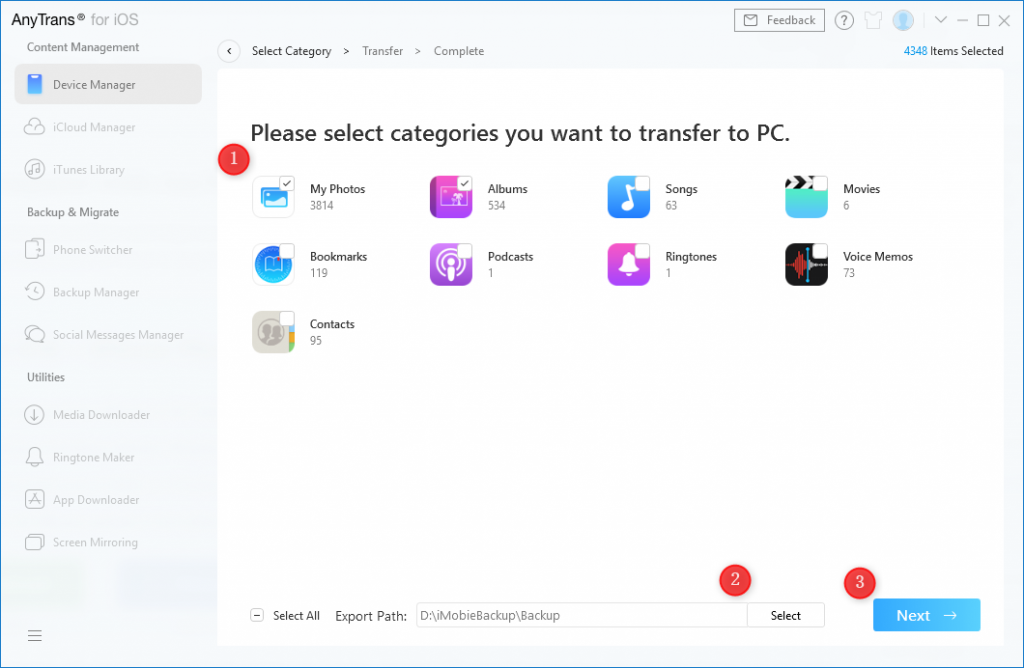

Step #4: Begin the transfer process
The next thing is to click the “Select” button to select the output folder and then the Right arrow butting to begin the transfer process. When the transfer process is complete – usually in a couple of minutes, you will the transferred photos neatly arranged in the output folder you have selected.
Step #5: Enjoy your photos on your pc
Now, you can enjoy your photos on your computer while you also free space on your iPhone. It is as simple as that. But if you still need help transferring photos from your iPhone to your pc, you can check this article here.
If what you want is a convenient and fast tool to transfer photos to computer, you will definitely find AnyTrans very helpful. It is an all-in-one iPhone manager anyone will enjoy using. You can give it a try too!