


Whether it happens slowly over the time or all of a sudden, attempting to collaborate with a slow laptop can be seriously irritating. Even if you’re fairly persistent with the maintenance of your laptop or COMPUTER, it’s unusual exactly how rapidly points slow down. If you’re experiencing such concerns and also running Windows 10, 8, or 7, this message is for you!
You’re are looking to speed up a super slow laptop? in this article we guide u speed up a slow laptop using various methods.
Thankfully, you do not need to trade in your computer right now. In fact, you can take numerous steps to give it a little an increase in the efficiency department. With some basic de cluttering to a couple of even more technical procedures, even the slowest computer can go back to its old self.
In this post, we disclose 14 things you can do to quicken a slow-moving laptop computer or COMPUTER utilizing Windows 10, 8, or 7. For this short article particularly, we’ll be concentrating on system performance problems as opposed to those pertaining to the network you’re utilizing. We’re running Windows 10, so we’ll be using this version for the instructions and also screenshots. However, any kind of changes for Windows 8 and also 7 will be noted directly listed below, if applicable.
Speed up a Slow Laptop in Windows 10
Below are the various methods to speed up a slow laptop in windows 10.
1. Close system tray programs
If your computer is off to a slow start, then it’s possible you have too many programs starting up at the same time as Windows itself. Items in the system tray often launch at startup and then stay running while you use your computer.
To access these items, click the upwards arrow toward the right side of your taskbar.

If there are any programs you don’t need to have running, right-click them and close.
2. Stop programs running on startup
Similar to programs running in the tray, other programs that automatically run on startup can slow down your computer. Some you may actually want to run, such as antivirus software, but others may be unnecessary.
Right-click the taskbar and select Task Manager or hit Ctrl-Shift-Escape to launch. Head to the Startup tab and you’ll be able to view each item that runs on startup, along with its impact.
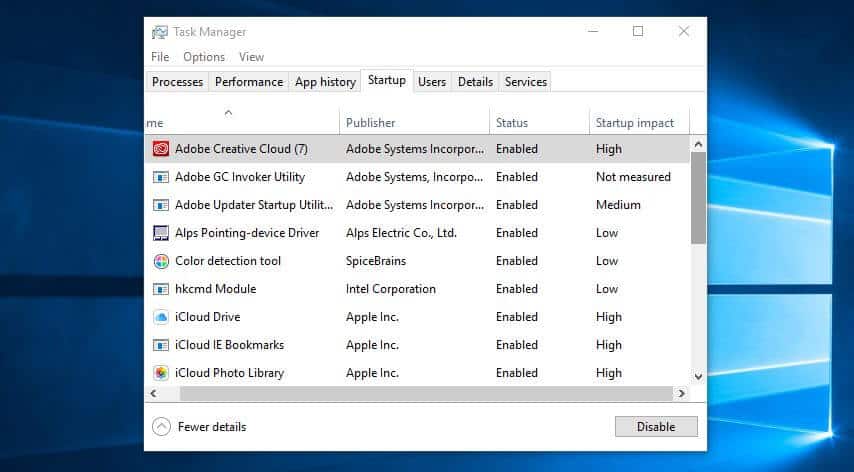
Go through these and decide which ones don’t need to start automatically. This process is especially beneficial to performance if you can disable some of the high impact ones. But note that some of these programs are vital for Windows to operate. For example, the ones with Microsoft listed as the publisher are probably best left alone. If you aren’t sure, either leave it, or try a Google search to find out more.
To disable, simply right-click and hit Disable. Remember, you’re not disabling the program, just the fact that it runs on startup.
Windows 7: Instead of accessing Task Manager, you’ll need to search for System Configuration.
3. Update your OS, drivers, and apps
You’ve probably heard that keeping your software up to date is a good idea for security. This is true and it can help performance too. Windows will automatically send you a notification when an update is available. You just need to make sure you don’t keep putting it off.
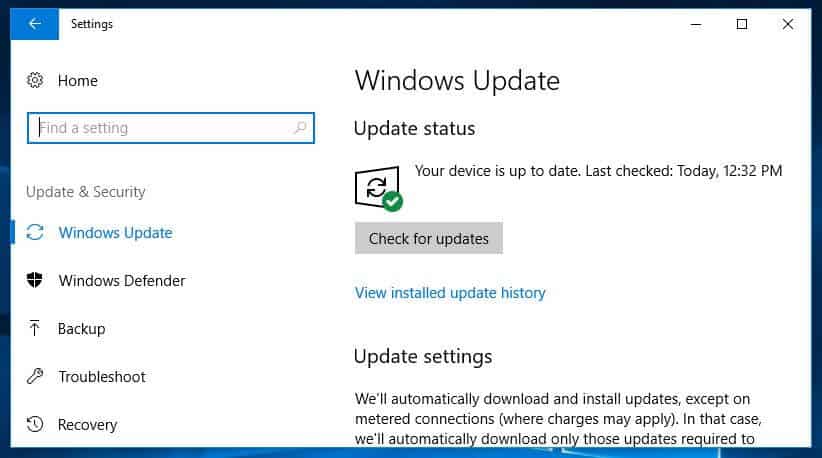
If you think you might have missed an update, you can always check. Go to Start and click Settings or the settings icon. Then go to Updates & Security>Windows Updates.
Aside from your OS, drivers and apps should be kept up to date too. Again, this is good for both security and performance. If you think you might have missed an update, a quick online search should tell you which version you should be using.
4. Delete unnecessary files
Just like our closets and drawers, our computers get cluttered. While you can’t really see it, you know it’s there, and it could be having a negative impact on your computer’s performance. This is especially true if you deal with a lot of large files, such as high-resolution images, audio files, and videos, on a day-to-day basis.
Free up space by making a habit of deleting files and folders each week and emptying the recycle bin afterwards. Doing this regularly means it’s more likely you’ll remember exactly what’s in the files and folders and won’t be so concerned about mistakenly deleting something important.
Handy tip: HDDs usually run at peak speed until they reach roughly 90% capacity. So if you check how much space is used up and you’re over 90%, that’s probably what’s slowing things down. SSDs slow down more gradually as they fill up, so it’s good to stay on top of things. It’s recommended not to fill an SSD to more than 75% of its capacity.
5. Find programs that eat up resources
If you find that your computer is suddenly running significantly slower, chances are there is a particular program to blame. One way to identify the culprit is to go into your task manager and find out what’s eating up your resources.
Right-click the taskbar and select Task Manager. Click More details to find out information about the programs that are currently running on your computer.
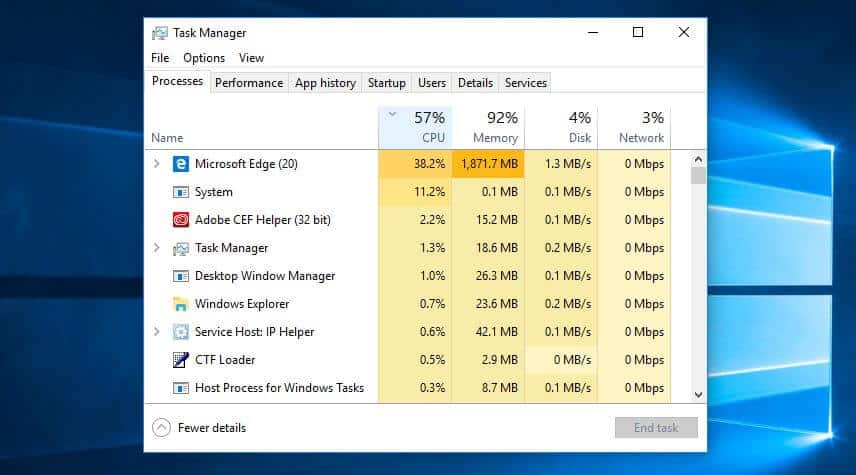
You can click each header to sort the list according to which applications are using the most of that particular resource. If you need to close something, try closing the actual application first. If it won’t close, come back to the Task Manager screen, right-click the application, and hit End task.
Windows 7: Instead of accessing Task Manager, you’ll need to search for System Configuration.
6. Adjust your power options
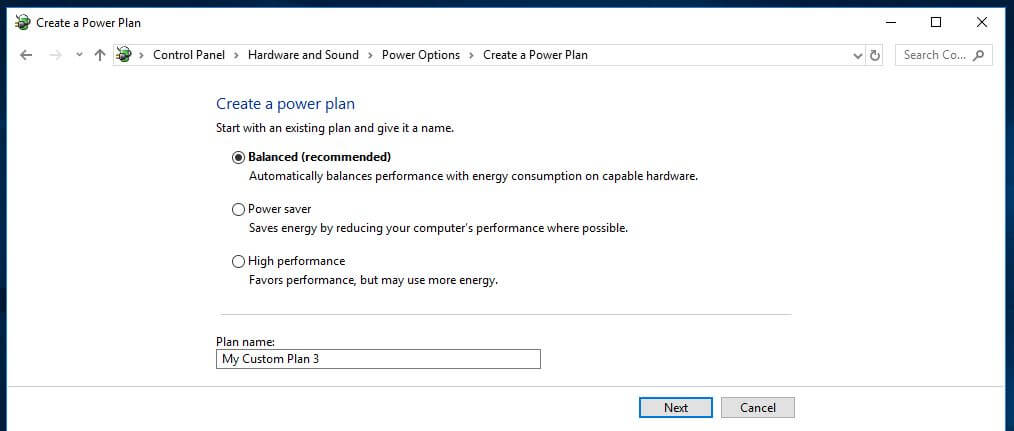
Windows comes with several preset ‘power plans’ to suit your needs. The default is set to Balanced, which takes into account performance and energy consumption. But the latter is only really a concern if you’re running off battery or trying to keep the electricity bills down. As such, you may want to change your plan.
The Power saver plan option is not a good idea if your computer is already slow. This reduces the performance of your PC to save energy. As its name suggests, the High performance plan is a better option. Although it uses more energy, it favors performance so should help speed up your machine.
Aside from the standard options, you could choose to create your own custom plan. Go to Control Panel>Hardware and Sound>Power Options>Create a power plan. Enter your plan name and select Next.
Alternatively, you can start with an existing plan and adjust accordingly. To do this, go to Control Panel>Hardware and Sound>Power Options>Choose or customize a power plan and select Change plan settings next to an existing plan.
In both cases, basic options include how long the display stays on for when you’re inactive and how long before the computer goes into sleep mode. These won’t really affect your computer’s speed, but if you go into Change advanced power settings, you can make more adjustments that will have an impact.
7. Uninstall programs you don’t use
We often install huge programs without realizing how much space they’re taking up. If you think that might be the case, then you can easily uninstall any programs you don’t use. Even if it’s a program you do use now and again, if it’s particularly big, it might be worth simply reinstalling each time you need to use it.
To uninstall a program, head over to Control Panel>Programs>Programs and Features.
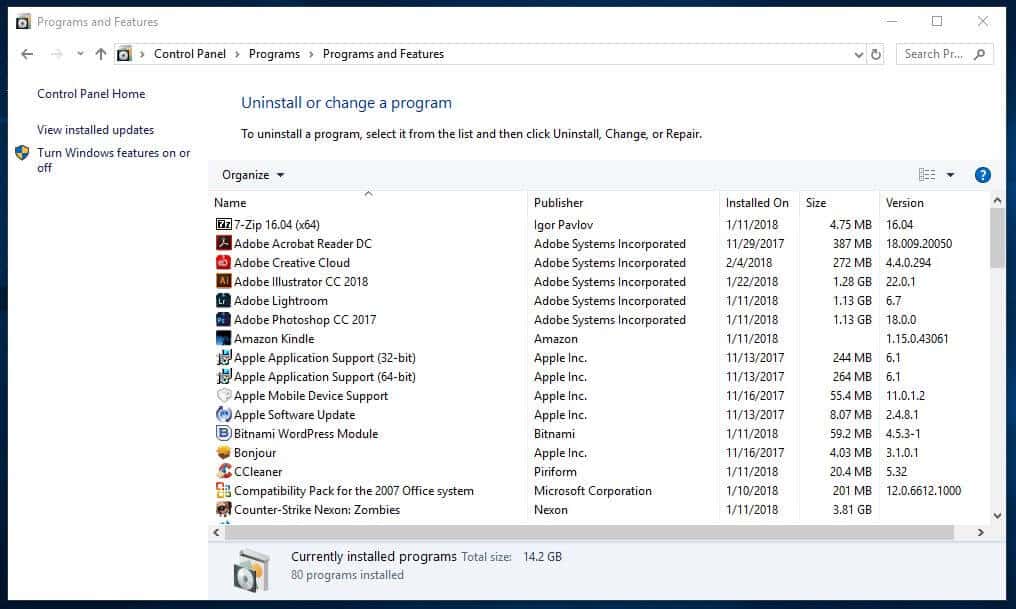
Go though the programs and decide which ones, if any, you don’t need. If you’re unsure about a particular program, you could simply use a search engine to find out more.
8. Turn Windows features on or off
While you’re in the Programs and Features screen, you might want to check to see if there are any Windows components you don’t need. Click Turn Windows features on or off and you’ll see a list of these components.
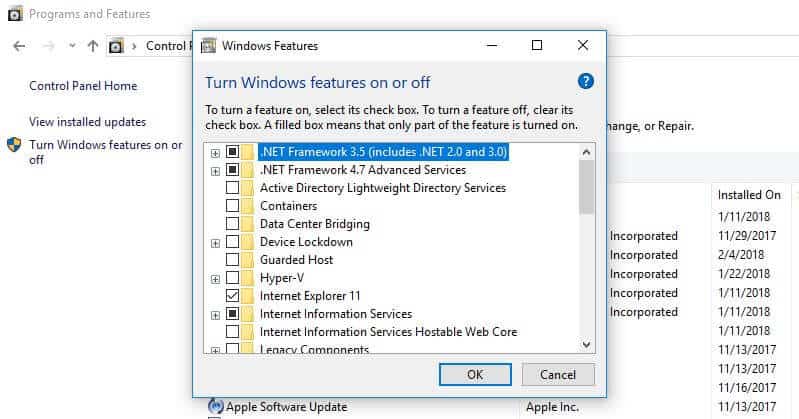
You’ll want to be careful you don’t turn off anything you actually need. So again, a search for anything you’re unsure about is a good idea.
9. Run a disk cleanup
Windows comes with a built-in tool for cleaning up junk that accumulates over time. To access the Disk Cleanup tool, go to Control Panel>System and Security>Administrative Tools, and select Disk Cleanup from the list.
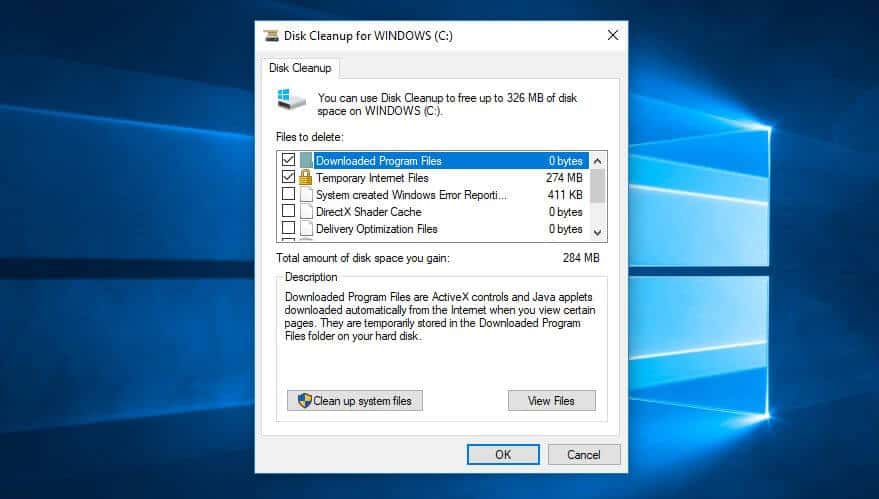
Here, you can select the types of files you want to get rid of and click OK. Then click Clean up system files and choose any system files you want to remove.
10. Defragment your hard drive
Over time, files on your hard drive become fragmented. As your computer now has to check in multiple places for the pieces, it can run more slowly. The term ‘defragment’ sounds a little dramatic, but it basically means putting those files back together so your system can run more efficiently.
In fact, it’s something that Windows 10, 8, and 7 do automatically on a set schedule. The default schedule is once per week, but you can go in and manually run it if you suspect there’s an issue.
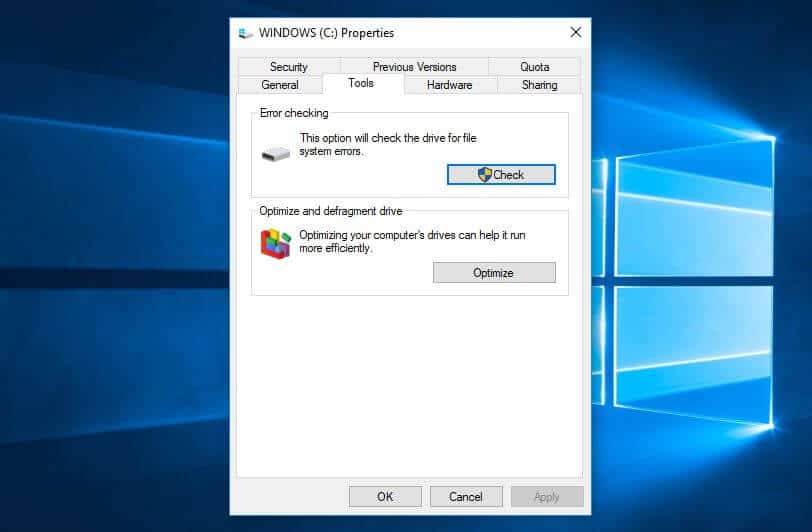
First, it’s important to note that you only need to do this if your computer uses a traditional mechanical Hard Disk Drive (HDD). A Solid State Drive (SSD) works differently from an HDD, and there is no need for defragmentation. If you have both, only defragment the HDD.
Go to My Computer and right-click the hard drive (by default named WINDOWS (C:) though you may have renamed it). Then go to Properties>Tools and under Optimize and defragment drive, click Optimize.
You’ll then get an Optimize Drives screen popup.
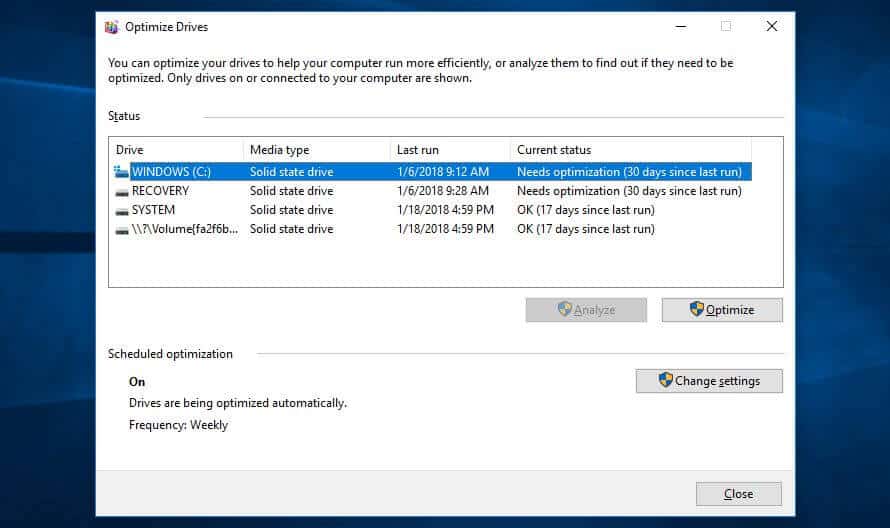
Note that in the above screenshot, all of the drives are SSD. These do not need to be defragmented. As in the image, Analyze will be grayed out for SSD drives, but will be available for hard drives.
Select an HDD drive and click Analyze to see how fragmented it is. A good rule of thumb would be to keep it below 5%. If it’s above, you can click Optimize to defragment the disk.
If you have an SSD, you’ll notice Optimize is actually an available option. Clicking it will run the TRIM command which will wipe data that is no longer considered in use.
Windows 7: Look for Disk Defragmenter using the search bar and select an HDD under Current status.
11. Adjust or disable graphics and animations
More recent versions of Windows come with lots of graphics, including animations such as fading effects and flyouts. These help make the application appear more sleek and refined and contribute to a better overall user experience. On the other hand, they can also slow down your computer.
Thankfully, it’s simple to adjust these settings and hopefully save a little processing power. Go to Control Panel>System and Security>System>Advanced system settings. Then, in the Performance section, hit Settings and you’ll have a full list of options.
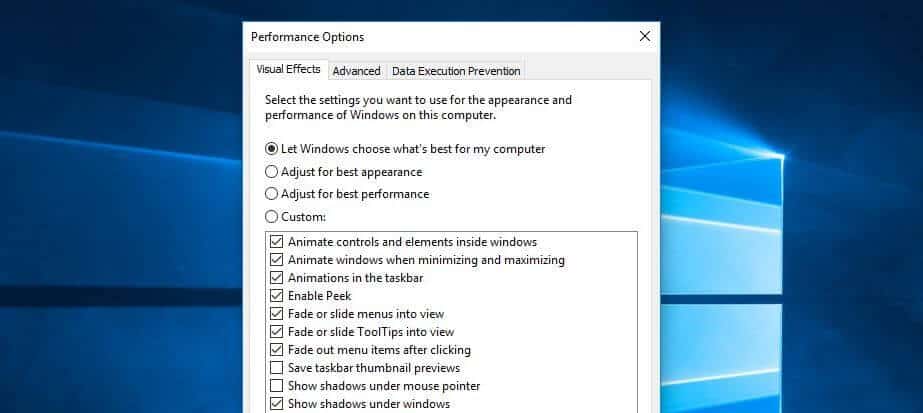
You can select Adjust for best performance (this will remove all visual effects) or opt to remove some individually. It’s a matter of preference, but fade and shadow features are some you could probably live without.
Windows 7: Search for Performance Information and Tools, select Adjust visual effects, and use the Visual Effects tab.
12. Check for malware
Malware (malicious software) is a broad term used to describe malicious programs that could cause harm to your computer. These may come from various sources, including email links, software downloads, and even ads (malvertisements). Aside from potentially causing permanent damage to your system, some forms of malware can cause your computer to run slow.
13. Disable Cortana
While the Windows 10 digital assistant, Cortana, is a handy feature, it uses up a lot of resources and also poses a privacy threat. Cortana used to be easily removed but in the up-to-date versions, it’s a little trickier. Nonetheless, if you’re willing to make an edit to your system’s registry, it can be done.
14. Upgrade your hardware
If you’ve tried all of the tricks above, it might be time to invest in some new hardware. Here are a couple of things you may want to consider putting some money into:
- Add an SSD: While HDDs offer more space for a lower price, adding an SSD can make your computer run much faster.
- Add more RAM: If you have an older system, it may have too little memory to run modern applications efficiently. What’s more, if you use a lot of programs simultaneously, you might not have enough Random Access Memory (RAM) to carry you through. Installing a new RAM kit could give you the boost you need.
A few more tips
Of course, it’s not just your operating system slowing things down. Some computer habits and other apps and systems could be contributing to an overall sluggish experience. Here are a few more tips to get you up to speed:
- Keep your computer clean: This may sound obvious, but accumulated dust and grime can actually slow down your computer. Physically cleaning your computer regularly could help speed it up and prevent overheating.
- Remove unused browser extensions: These can slow down your browsing experience so it’s worth doing some regular housekeeping there.
- Use a memory-saving extension: Speaking of extensions, if you’re a Chrome user, there’s a popular extension (The Great Suspender) which reduces the memory footprint of open tabs.
- Restart regularly: Sometimes all you need is a fresh boot. Restarting your computer can enable updates to take effect and shut down stuck programs. When you’re taking a break, it could be a good time to hit restart while you go and make yourself a cuppa.
- Run fewer simultaneous programs: Just like multitasking can be detrimental to our productivity, running lots of programs simultaneously can dampen your computer’s speed. Make a habit of closing programs instead of just minimizing them and you should see some improvement.
- Reinstall the operating system: If you’ve tried everything and you’re still running into problems, a last resort might be to use a fresh install of Windows.