


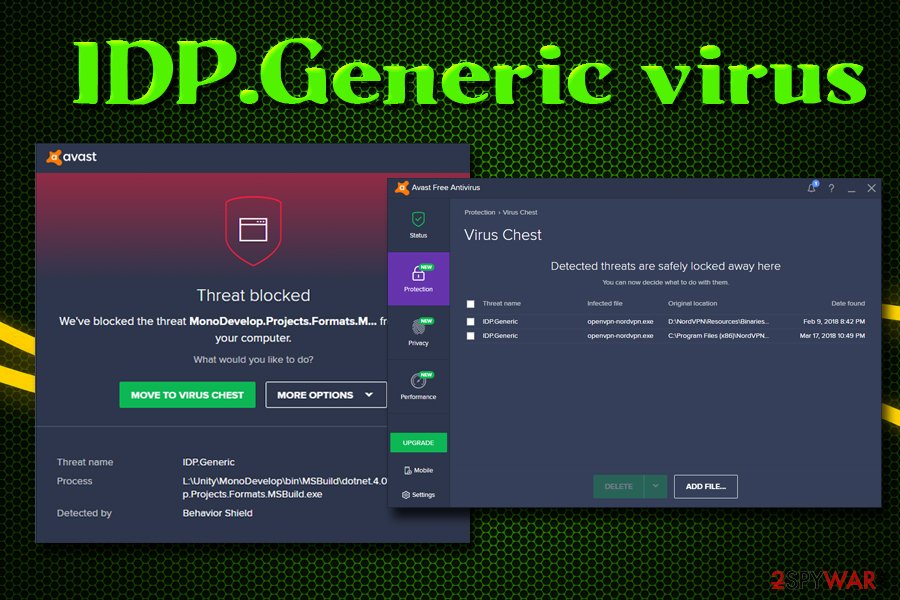
A lot of Windows users are getting the idp.generic virus detection on their files. This IDP.Generic threat isn’t related to a specific file so there’s an extensive range of files that might be detected as infected with IDP.Generic. By way of example, some users have been experiencing the IDP.Generic threat with their game files whereas some users saw this danger whilst utilizing a python file. Though this threat detection isn’t specific to an antivirus but the vast majority of the users who underwent this were using Avast antivirus. Obviously, as soon as your antivirus finds such viruses in files related to your games, you would not be able to play your games or other apps. So, a great deal of users are concerned and want to make sure whether it is a malware or even a false positive.
What Is idp.generic?
For Those Who use various anti-virus Software, IDP.Generic is a frequent threat title. Protection’, so when a security application finds a threat called IDP.Generic, it indicates that it had been discovered by this element (Identity Protection), that generalized a folder that is found. This discovery Is frequently ‘false positive’.
There are many potential infections that could be generalized as IDP.Generic risks. For example, a match file. If the installed antivirus software detects it as a hazard, it’s very probable that the game will not be able to start. The same applies to additional programs that have files identified as IDP.Generic risks. As mentioned, this threat is commonly categorized as a false positive detection – the installed antivirus application detected a harmless/legitimate file for a threat and quarantined or removed it.
| Name | IDP.Generic trojan |
| Threat Type | Trojan, Password stealing virus, Banking malware, Spyware. |
| Detection Names (setup.exe) |
Avast (Win32:OnLineGames-AB [Trj]), BitDefender (Trojan.Crypt.Delf.AF), ESET-NOD32 (a variant of Win32/PSW.Lineage.AJP), Kaspersky (HEUR:Trojan.Win32.Generic), Full List (VirusTotal). |
| Additional Information |
Be aware that information within anti-virus databases continually changes, and thus that the IDP.Generic detection name could change as well. For this reason, files detected as IDP.Generic might be detected under a different threat name (and vice versa) after a database update. |
| Symptoms | Trojans are designed to stealthily infiltrate the victim’s computer and remain silent. Thus, no particular symptoms are clearly visible on an infected machine. |
| Distribution methods | Infected email attachments, malicious online advertisements, social engineering, software cracks. |
| Damage | Stolen banking information, passwords, identity theft, victim’s computer added to a botnet. |
How to solve idp.generic using Avast Antivirus.
First of all, you should take the file out of the virus vault because your antivirus will block it. You can do so by following the steps given below.
- Open your Avast antivirus applications
- Go to Protection
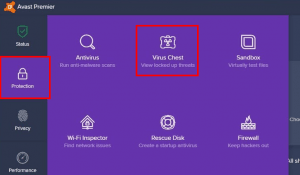

- Select Virus Chest
- Right-click your file
- Select Restore and add excursion.
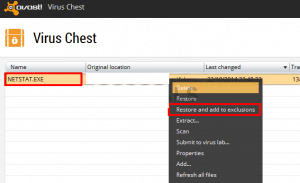

Although these steps are for Avast antivirus but these step should apply to other antivirus applications as well. Every antivirus has a virus vault and provides an option to restore the files from there.
You should also upload the file to the false positive form to let Avast know about the file. This will prevent any future false positives. Click here and fill out the details.
How To Fix & Clear The “IDP.Generic” Alert ?
Update Antivirus Definitions (Update AVG/Avast)
The “IDP.Generic” is a well-known issue in programs like AVG & Avast Antivirus software. The simplest way to fix the same is by updating your AVG or Avast antivirus software to the latest version. You can do so by:
- Open AVG software. Proceed to the Menu bar and then, open the tab Settings.
- From here, you can click on the option “Update”. Try updating both the virus definition as well as the program.
- Restart your computer to check whether or not the problem has been fixed.
How to Remove Malware Manually?
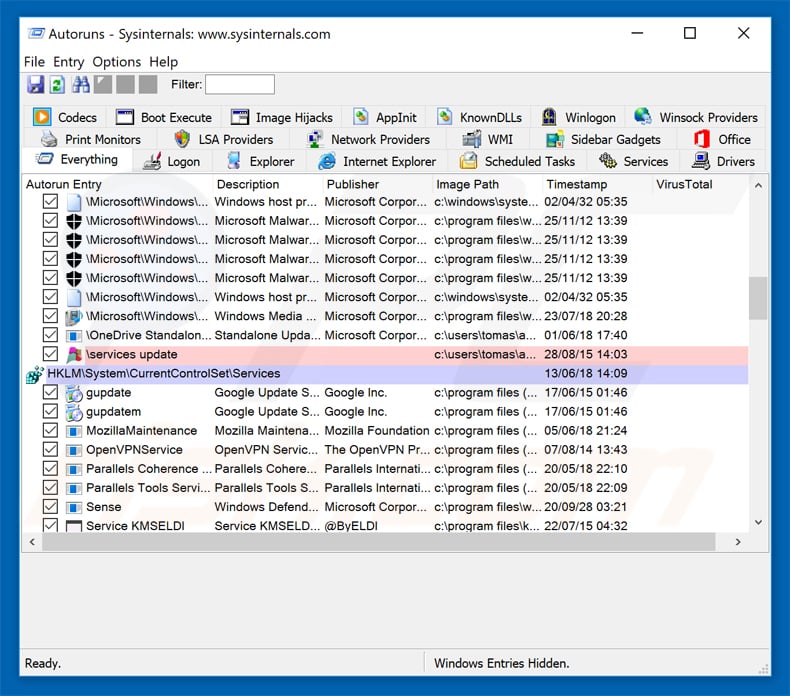
Manual malware removal is a complicated task – usually it is best to allow antivirus or anti-malware programs to do this automatically. To remove this malware we recommend using Restoro for Windows. If you wish to remove malware manually, the first step is to identify the name of the malware that you are trying to remove. Here is an example of a suspicious program running on a user’s computer:
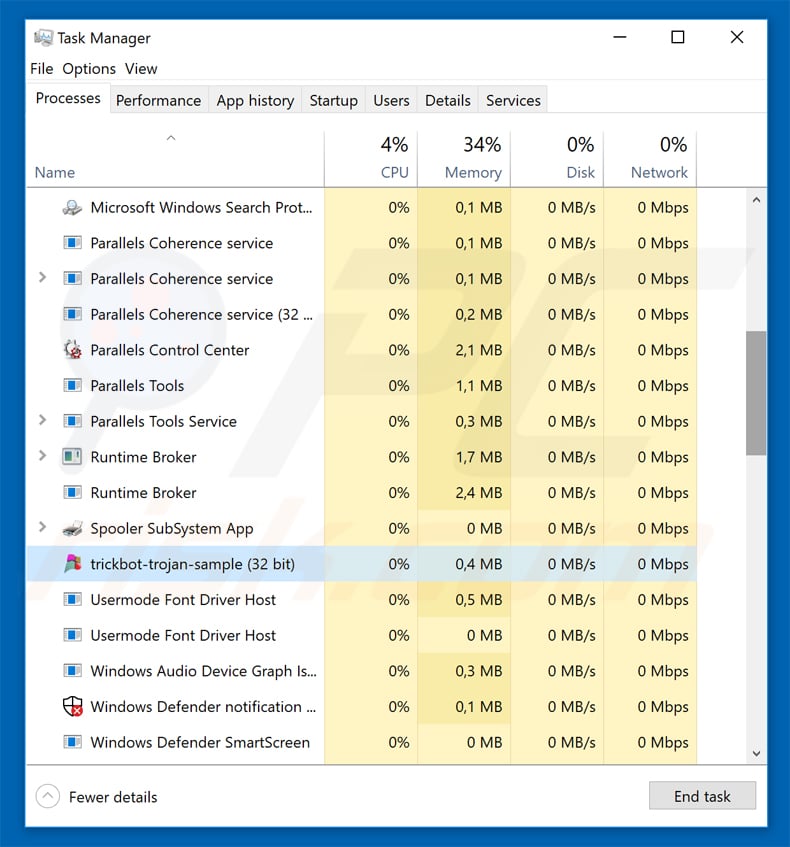

If you checked the list of programs running on your computer, for example, using task manager, and identified a program that looks suspicious, you should continue with these steps:
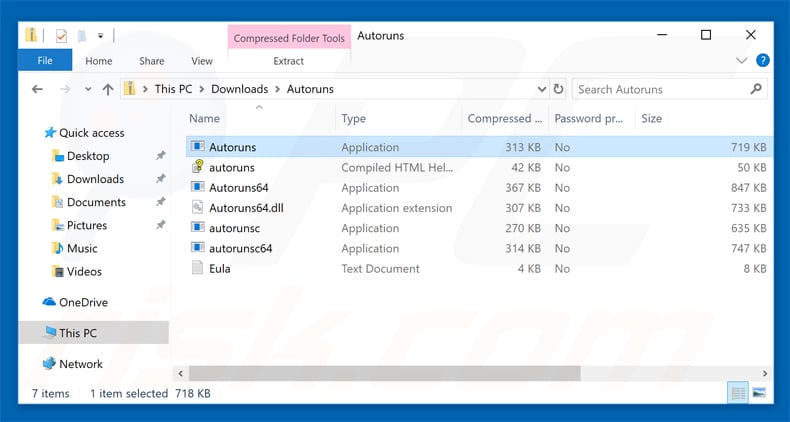
1. Download a program called Autoruns. This program shows auto-start applications, Registry, and file system locations:

2. Restart your computer into Safe Mode:
Windows XP and Windows 7 users: Start your computer in Safe Mode. Click Start, click Shut Down, click Restart, click OK. During your computer start process, press the F8 key on your keyboard multiple times until you see the Windows Advanced Option menu, and then select Safe Mode with Networking from the list.
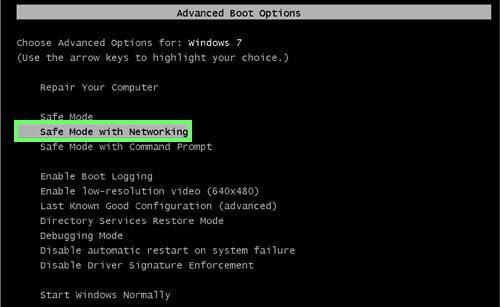

Video showing how to start Windows 7 in “Safe Mode with Networking”:
Windows 8 users: Start Windows 8 is Safe Mode with Networking – Go to Windows 8 Start Screen, type Advanced, in the search results select Settings. Click Advanced startup options, in the opened “General PC Settings” window, select Advanced startup. Click the “Restart now” button. Your computer will now restart into the “Advanced Startup options menu”. Click the “Troubleshoot” button, and then click the “Advanced options” button. In the advanced option screen, click “Startup settings”. Click the “Restart” button. Your PC will restart into the Startup Settings screen. Press F5 to boot in Safe Mode with Networking.
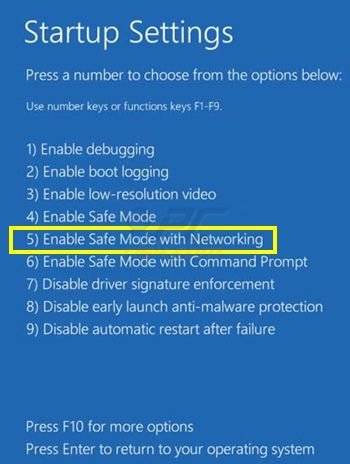

Video showing how to start Windows 8 in “Safe Mode with Networking”:
Windows 10 users: Click the Windows logo and select the Power icon. In the opened menu click “Restart” while holding “Shift” button on your keyboard. In the “choose an option” window click on the “Troubleshoot”, next select “Advanced options”. In the advanced options menu select “Startup Settings” and click on the “Restart” button. In the following window you should click the “F5” button on your keyboard. This will restart your operating system in safe mode with networking.
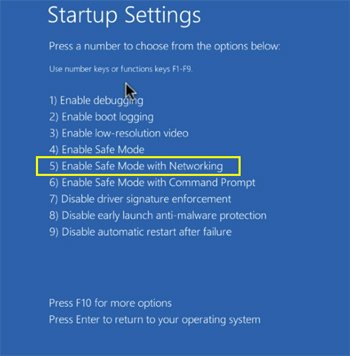

Video showing how to start Windows 10 in “Safe Mode with Networking”:
3. Extract the downloaded archive and run the Autoruns.exe file.

4. In the Autoruns application, click “Options” at the top and uncheck the “Hide Empty Locations” and “Hide Windows Entries” options. After this procedure, click the “Refresh” icon.
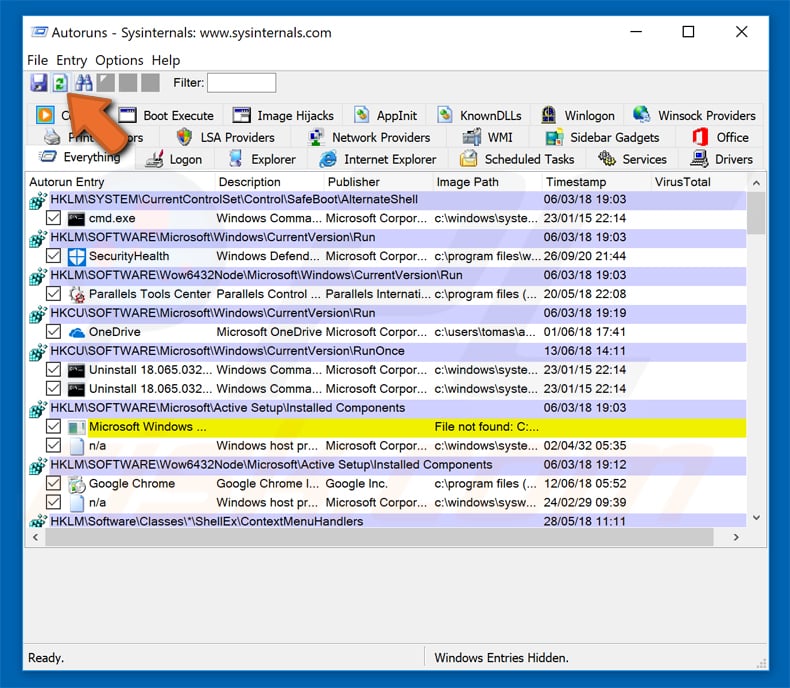

5. Check the list provided by the Autoruns application and locate the malware file that you want to eliminate.
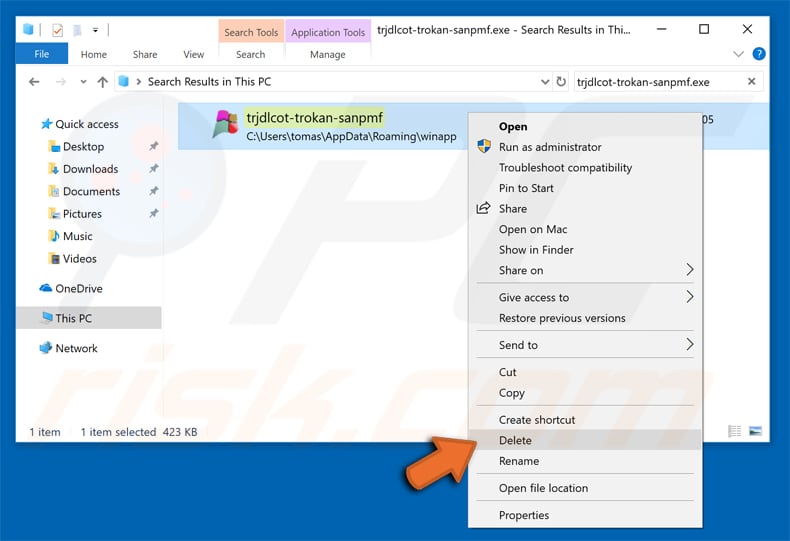
You should write down its full path and name. Note that some malware hides process names under legitimate Windows process names. At this stage, it is very important to avoid removing system files. After you locate the suspicious program you wish to remove, right click your mouse over its name and choose “Delete”.


After removing the malware through the Autoruns application (this ensures that the malware will not run automatically on the next system startup), you should search for the malware name on your computer. Be sure to enable hidden files and folders before proceeding. If you find the filename of the malware, be sure to remove it.

Reboot your computer in normal mode. Following these steps should remove any malware from your computer. Note that manual threat removal requires advanced computer skills. If you do not have these skills, leave malware removal to antivirus and anti-malware programs. These steps might not work with advanced malware infections. As always it is best to prevent infection than try to remove malware later. To keep your computer safe, install the latest operating system updates and use antivirus software.
To be sure your computer is free of malware infections, we recommend scanning it with Restoro for Windows.