


If you’re just getting started in the world of UI/UX design or you’re a professional who is breaking out on their own freelancing career, you probably don’t want to spend a lot of money upfront for expensive design and prototyping software. Rather than go with a completely free platform like an open-source prototyping tool, why not consider the other free prototyping tool option; that is, a premium prototyping platform that offers you a free-forever plan? It’s essentially the same as a free prototyping tool as long as the features aren’t restricted, even though there may be some limits on the number of projects you can save or the amount of storage space you get. Nevertheless, it’s a great option to explore because you can get started right away without paying anything. Later on, if you decide to continue using the platform for more projects, you can choose to upgrade to a paid plan. This gives you quite a bit of flexibility, which you absolutely need when you’re on a new path to UI/UX design excellence.
Of all the online free prototyping tools available today, nothing is more compelling than Wondershare Mockitt. You’ve probably heard of or used the company’s other well-known productivity and creativity tools. Wondershare Mockitt is a cloud-based software application for UI/UX design and prototyping and the latest addition to the Wondershare family of software products. This article introduces some key features and benefits of the software and shows you how to get started with your first prototyping project in just minutes.
Wondershare Mockitt – Key Features and Benefits Table
| Key Feature | Associated Benefit(s) |
| Global accessibility | ● The cloud-hosted application can be accessed from any connected device, allowing the designer to work from home or anywhere else with a simple and secure login.
● Projects can be shared for review online in a secure manner. ● Developers can log in to inspect code directly and download all asset-related content. |
| Extensive asset base (asset library containing design components, widgets, and other elements) that is customizable and sharable | ● No need for third-party imports
● Customize assets and personalize your library ● Access shared libraries across teams |
| Easy-to-use interface with intuitive controls | ● Clean and slick UI – zero distractions
● Drag-and-drop, double-click, and other intuitive actions ● Clear sections for design, preview, share, etc. |
| Rapid page state creation, with dynamic widgets option | ● Easy to create multiple page states
● Dynamic widgets allow in-page interactions ● Master Widget status allows global editing of multiple component instances |
| Easy prototyping | ● Create an interaction in seconds by establishing a link and specifying a gesture along with a transition and/or animation effect
● Varied choice of gestures, transitions, and effects |
| Convenient collaboration | ● Cloud platform enables global collaboration
● Feedback and reviews can be done faster ● Less time to complete the prototype and have it approved by the client |
| Automatic generation of code components | ● Easier for the developer to code inspect and download asset-related information
● Smoother designer to developer handoff |
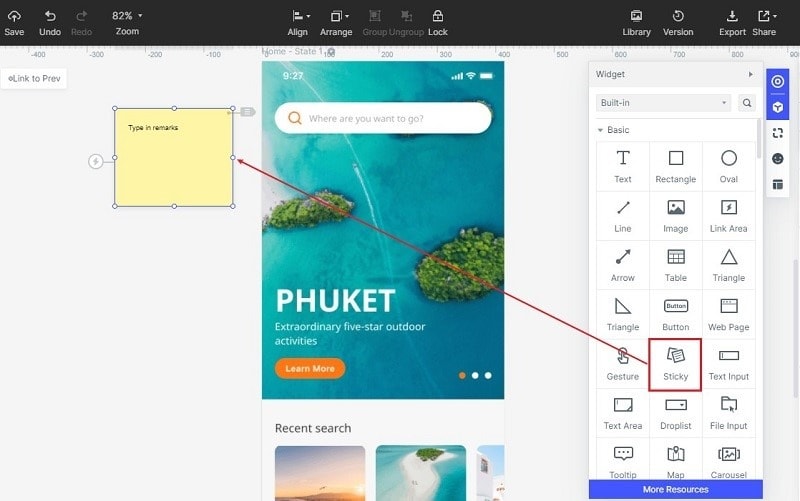
| Annotate your designs | ● Add notes and ideas directly into your design using the Sticky Notes widget
● Clarify parts of your design without having to send separate notes |
| Platform-independent | ● Works with any operating system with a modern browser and an Internet connection
● Work on any device at your convenience |
| Free to use and affordable to upgrade | ● Use the free plan for your initial projects
● Upgrade in an affordable manner when your needs grow |
Now that you have an idea of what Wondershare Mockitt offers and how it can benefit you directly, let’s look at an example of how to create a prototype with better UI and UX design. First, you will need to complete a free registration to get yourself an active account on the Wondershare Mockitt platform. Once you have done this, follow the instructions in the section below.
How to Prototype like a Pro using Wondershare Mockitt
After signing in to your Mockitt account, you should be able to see the main interface of this cloud-based software. Any changes you make will be saved immediately to the cloud, which means there is a zero chance of losing any of your work. Ready to get started? Let’s go!
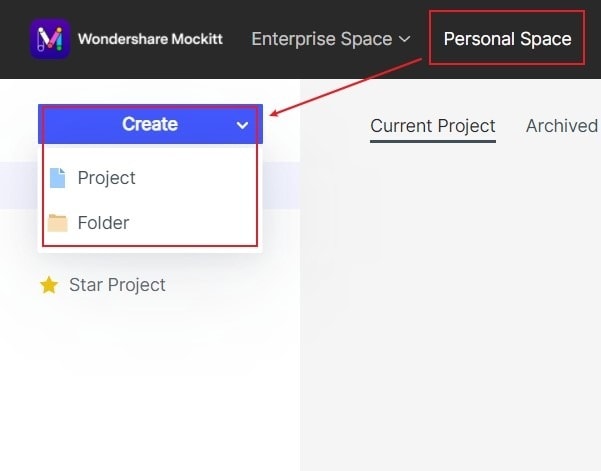
1. Create a New Project
The first step is to click the Create button on the top left-hand side of the main window to set up a new project. In this section, you can assign a name to your project and choose the type of device that you are creating the design/prototype for. This is important because different screen types will require different layouts.

2. Design your Screens
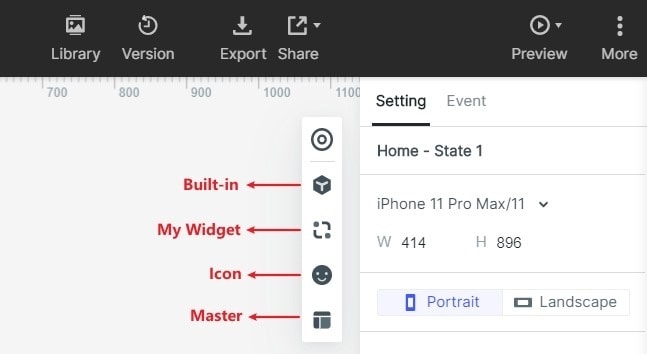
Once your new project is set up, start adding design elements and widgets to your first screen. You can do this by double-clicking an asset from the library on the right side or the quick panel on the left side. You can also simply drag the component and drop it on the screen. Edit the component to match your requirement, such as adding text, resizing, or repositioning. Continue to do this until the home screen of your app or website is ready.
Add a new screen and use the same actions to create the design for your second, third, and subsequent screens. To show an interaction, you will need different page states for a single screen, so start on one screen and keep adding additional page states to it. The designs on subsequent states can be modified to match the new state of the screen.
Mockitt also allows you to create Dynamic Widgets that can show multiple states within a screen. In addition, you can add a component to your personal widget list and even assign a Master status so all similar widgets can be edited globally by editing just one instance.

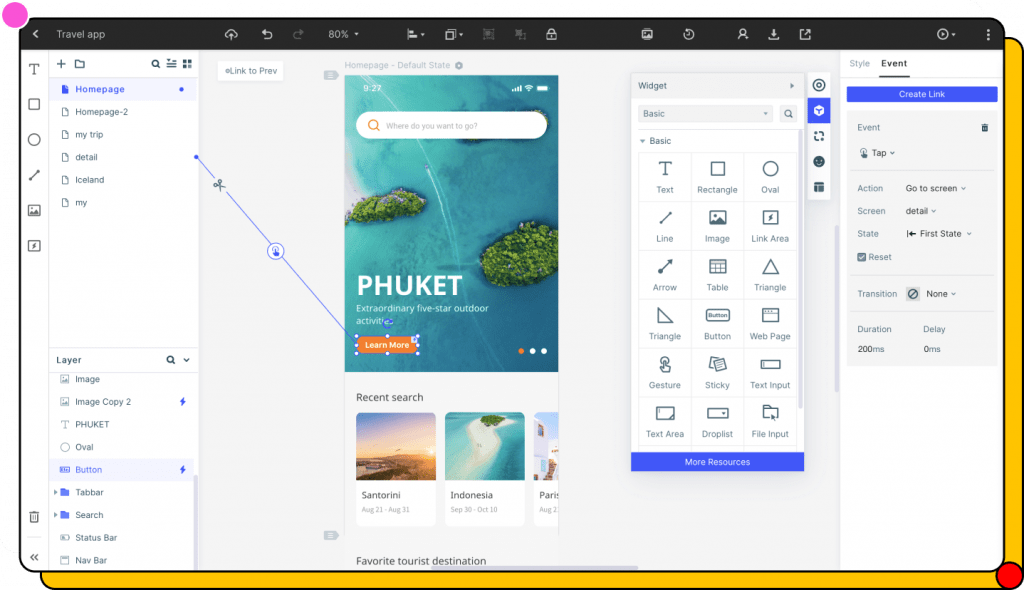
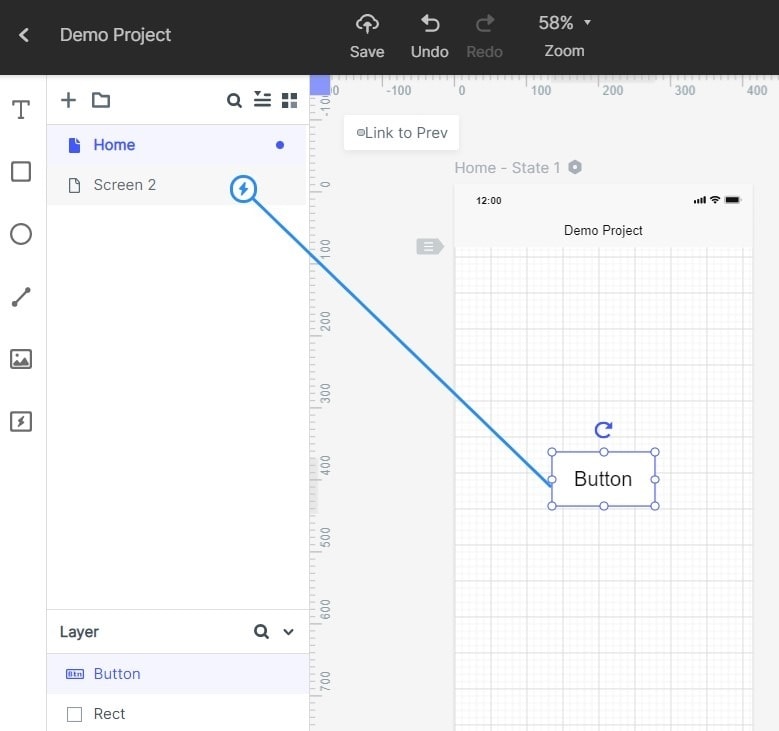
3. Add Interactions
To add an interaction, link a component to its target page state by dragging the link icon next to the widget and dropping it on the target page listed on the navigation panel on the left. On the right-side panel, you can edit the link to establish a gesture to trigger the transition, add the transition itself, and then choose an animation effect for the transition.
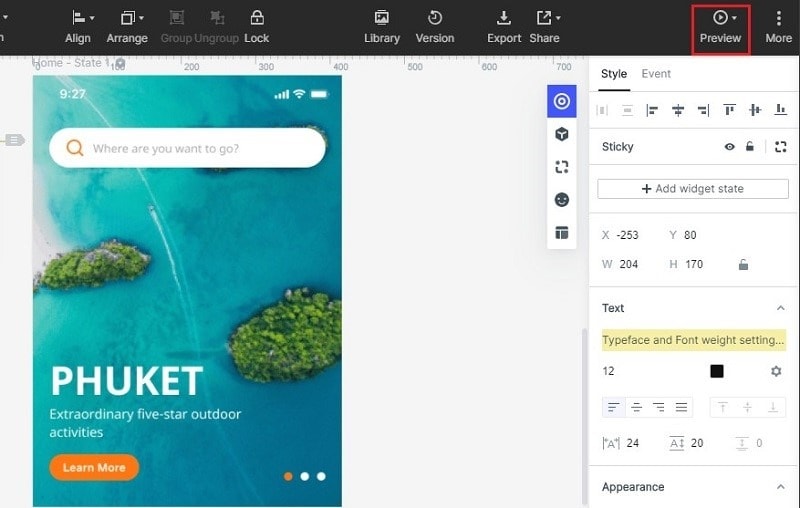
Do this for every interactive element in your design. You can check the validity of your interactions at any time by using the Preview option.

4. Add Notes (Annotations)
If you need to, you can add annotations in the form of Sticky Notes, by using the Sticky widget. This will allow you to leave notes for other stakeholders to see. It is very useful for explaining certain parts of your design logic that may not be immediately apparent to the reviewer, whether that’s your project manager, a team member, or the client. For offline review, you download the HTML demo package and send it via a secure email account.

- Preview and Share your Hi-fi Prototype with Key Stakeholders
Your fully interactive prototype can now be previewed by you for a final check. Once you’re happy with the design and the working of the prototype, you can click the Share option to generate a QR code or URL to distribute the design in a secure manner.

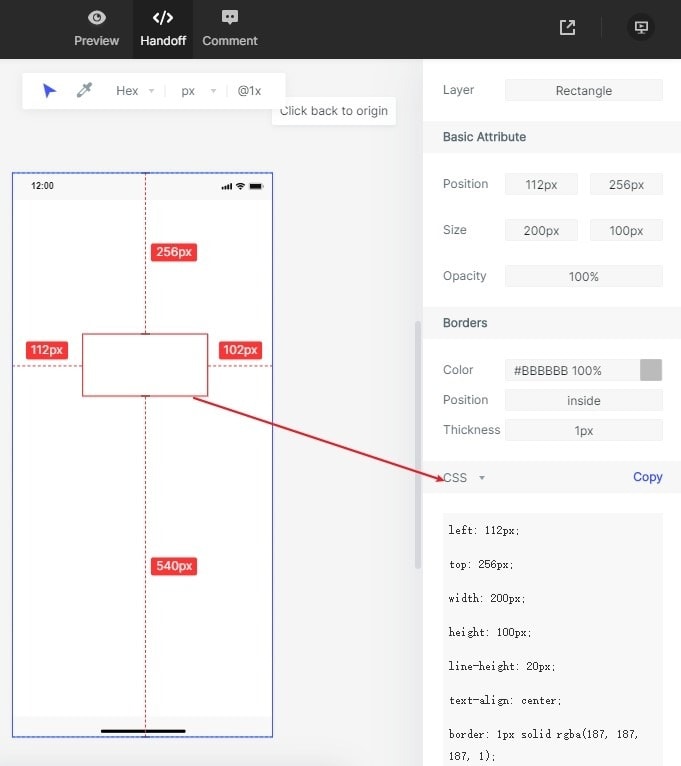
6. Developer Handoff
In this final stage, there’s almost zero work for the designer. The developer comes in, does a code inspection, and downloads whatever asset information is required to begin the development part of the process.

Wondershare Mockitt fills a lot of gaps left by other paid and free as well as offline or online prototyping tools in the market, such as affordability, accessibility, usability, output flexibility, and so on. As such, it offers a compelling balance of user-friendliness, functionality, and price.