


How to install Fusion on Kodi 17.6 Krypton and also exactly how to install addons making use of Fusion. The method described in this guide works on all the Kodi supported devices including FireStick, Fire TV, Windows PC, Android mobile phone, and also tablet computers etc
Kodi is a media player whose full potential is only discovered with the suitable attachments. Fortunately is that there are thousands of addons out there for all type of requirements and also objectives. While video addons are the most popular, Kodi likewise supports various utility as well as maintenance addons that make this media gamer extra efficient. The only challenge is finding the right addon for your demand.
You’re Looking to Install Fusion on Kodi 17.6 Krypton, In this article we guide u to install Fusion on Kodi 17.6 Krypton using various methods.
The majority of us normally seek out for every add-on individually. When you have numerous addons to set up, this technique could be bothersome at ideal. The good news is, you don’t need to do it anymore. You can set up Kodi Combination, a source of tons of databases and also addons. Fusion addon was as soon as removed last year for a few months. Yet, now it is back and it is far better than before.
Let me now show you how to add the Fusion source to Kodi. We will also learn how to install the Indigo add-on, which is further a source for a variety of addons. Later, we will also see how to install repositories using Fusion. Keep reading!
Enable Third-party Addon Installation
The first thing you want to do is allow the third-party addon installation by enabling ‘Unknown Sources.’ Here is how you can do it:
- Open Kodi
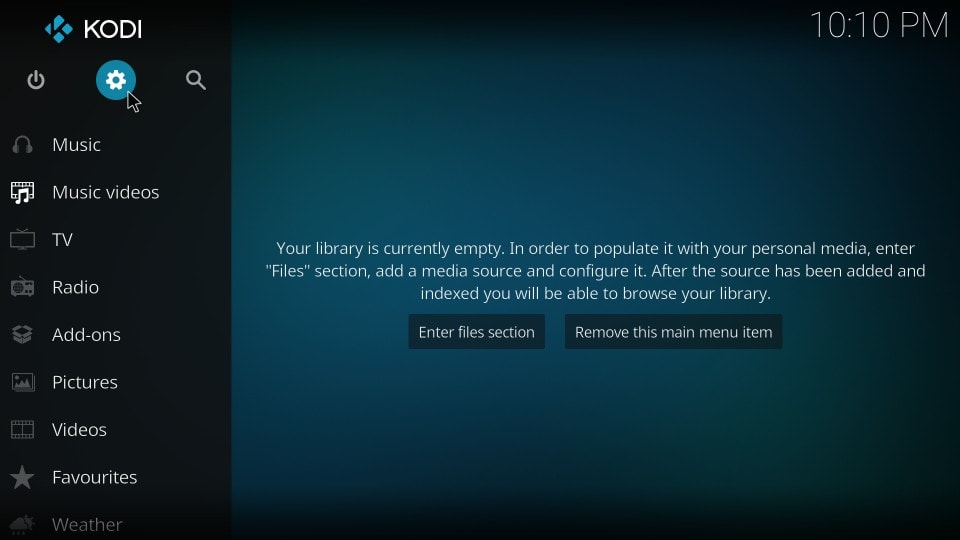
- Open Settings option from the home screen by clicking the gear icon on the top left, underneath the Kodi logo
- Click ‘System Settings’
- Click ‘Add-ons’ on the left panel and enable Unknown Sources on the right
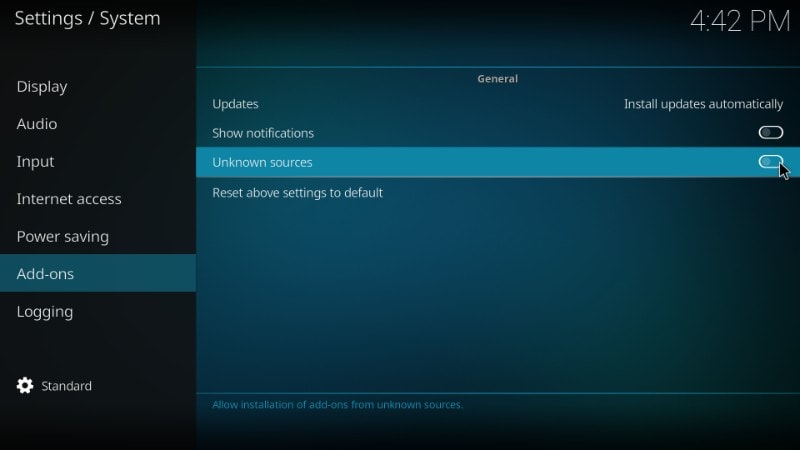

- When you see the following warning message, click ‘Yes’. Fusion is a tested and safe source.

How to Install Fusion on Kodi 17.6 Krypton
Fusion for Kodi is not exactly an add-on, but a source from where you can download several repositories and dozens of addons. So, we will first learn how to add the Fusion Kodi source and then we will see how to install addons like Indigo from it.
To add Fusion to Kodi, follow the steps below.
STEP 1: Make sure you are on the Kodi home-screen. Open ‘Settings’ option on the top-left.

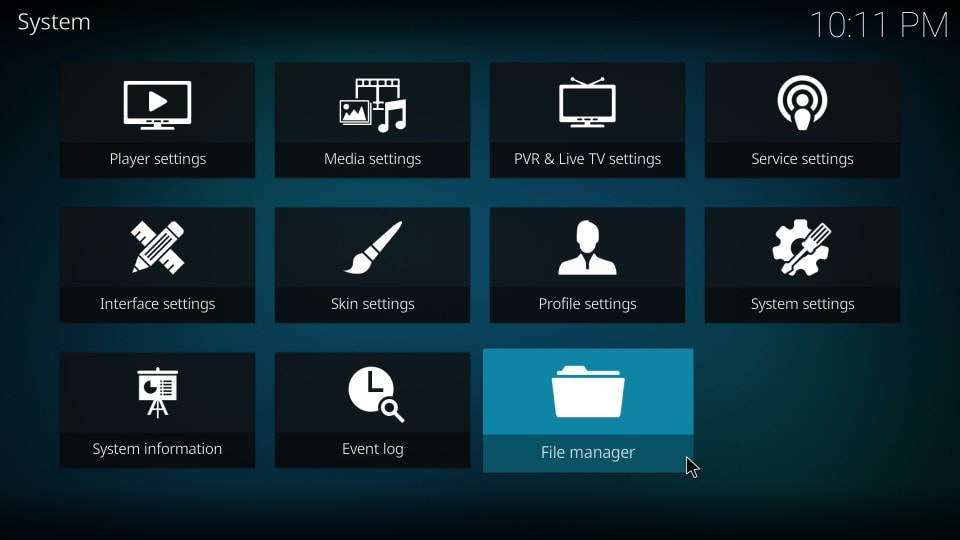
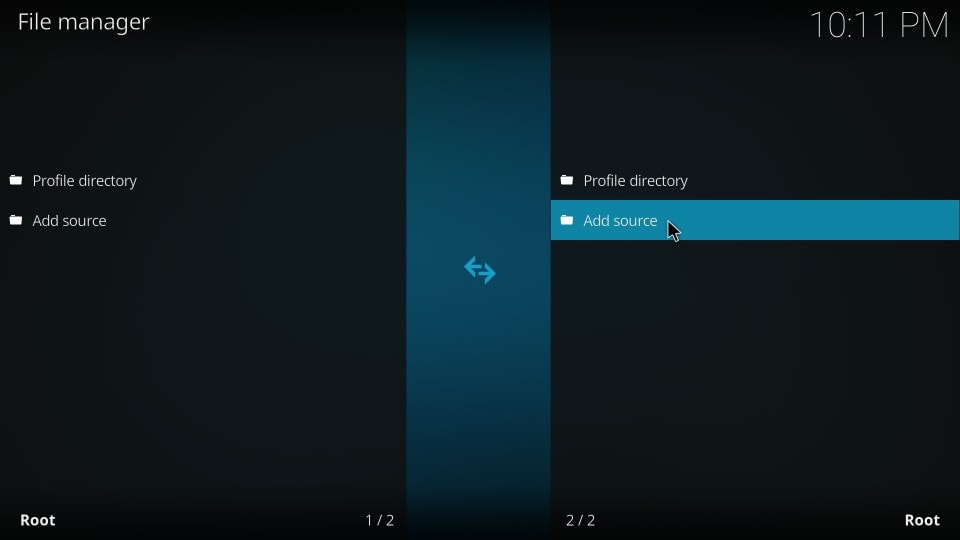
STEP 2: Open the ‘File Manager’ option the next
STEP 3: Now click ‘Add source’ in the next window.
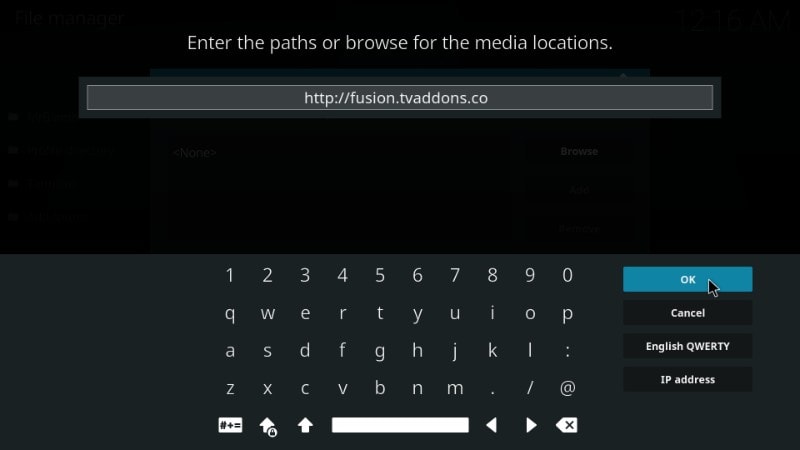
STEP 4: Click ‘<None>’ on the ‘Add file source’ dialogue box that shows up

STEP 5: Type in http://fusion.tvaddons.co. Make sure you type in the address correctly or you will not be able to add the source to the Fusion repo collection. Click ‘OK’ once done.
STEP 6: Now, in the ‘Enter a name for this media source’ type in the name you want to give to this source. I am going to name it ‘Fusion’. You may choose any name you like, but make it relevant.
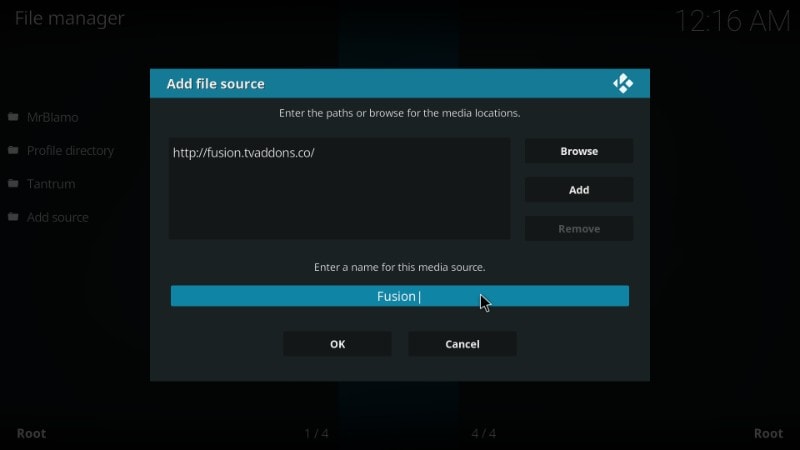
STEP 7: Now click ‘OK’ after entering the source name
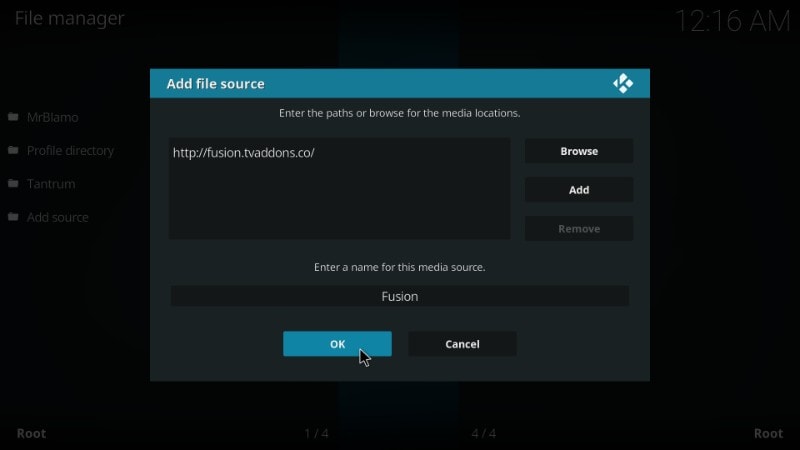
You have successfully added the Fusion installer source on Kodi. Now, let’s see how to access the source to install the repositories and addons.
STEP 8: Go back to the Kodi home screen and click ‘Add-ons’ option on the left panel
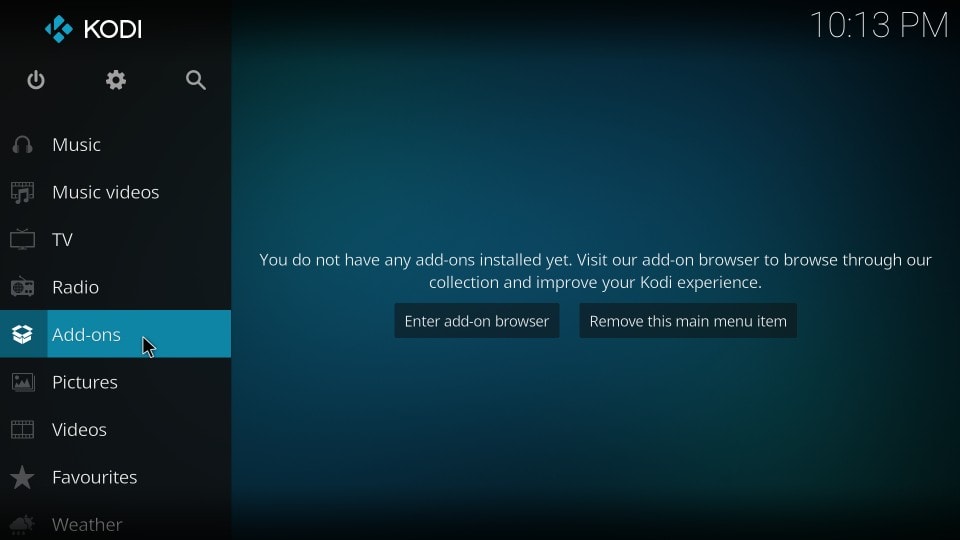
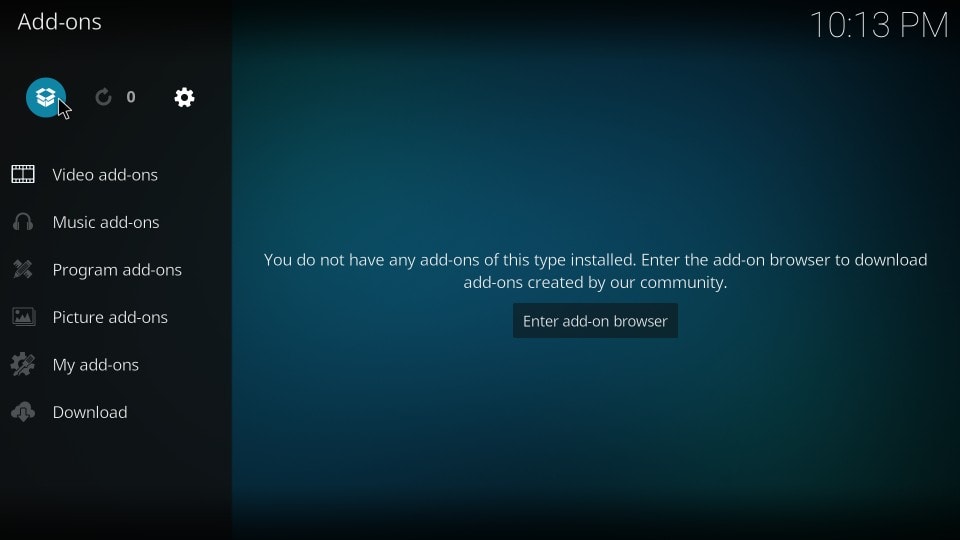
STEP 9: Click the ‘open-box’ icon at the top left. This icon is also called ‘Package Installer’.
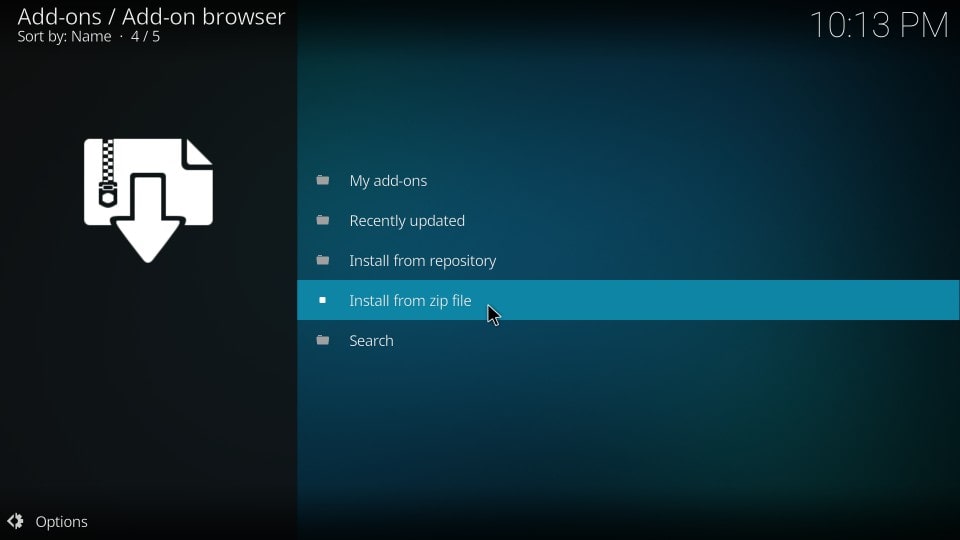
STEP 10: Now click ‘Install from zip file’ on the next Window
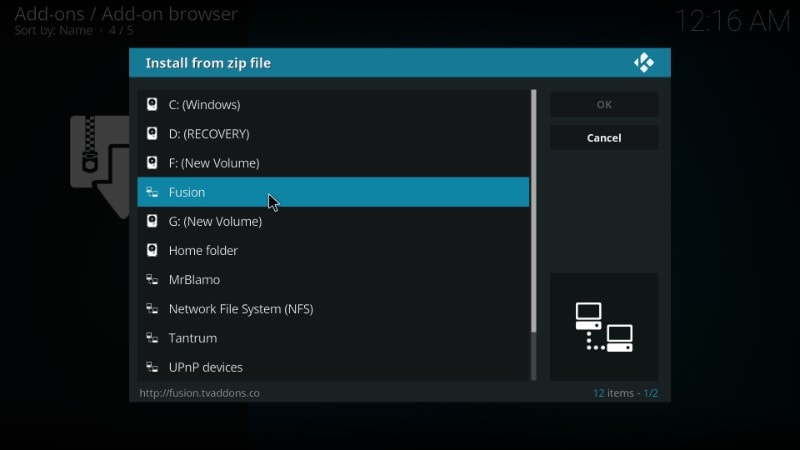
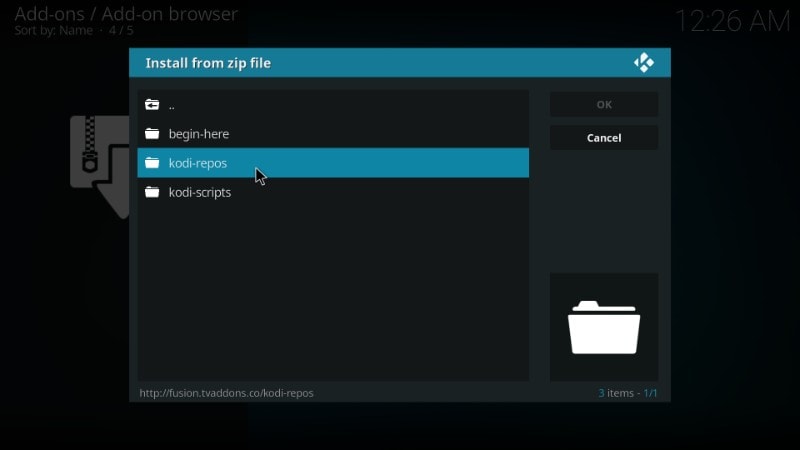
STEP 11: Now you should be able to see the list of added sources. Click ‘Fusion’, the name of the source we added a little while back
Fusion repos and addons are further organized into three categories namely:
- begin-here
- kodi-repos
- kodi-scripts

We will explore Fusion source further. But, let’s first install the Kodi Indigo addon, which is available inside ‘begin-here’
How to Install Indigo Addon on Kodi
Indigo is the most popular add-on available through the Fusion installer. This is why it will be the first item we will install from Fusion for Kodi. We will also explore Kodi Indigo addon together.
Indigo is a versatile addon that brings many tools and utilities and adds many functions to Kodi. Indigo is most popularly known as the Kodi addon installer. This addon lets you install dozens of apps from its library in a wide range of categories including Fusion TVAddons, movie addons and a lot more.
With Indigo, add-on installation becomes extremely easy. You can get any addon from its library with just a touch of the button. You can also install any addon from a zip file saved online by providing the URL to the file.
Here is how you can install Indigo addon.
STEP 1: From the Kodi home-screen, click Add-ons on the left, followed by Package Installer icon on the top-left. Now, click ‘Install from zip file’. When you see the list of the added sources, simply click ‘Fusion’
STEP 2: As we have already seen, Fusion is divided into three categories. Click ‘begin-here’.
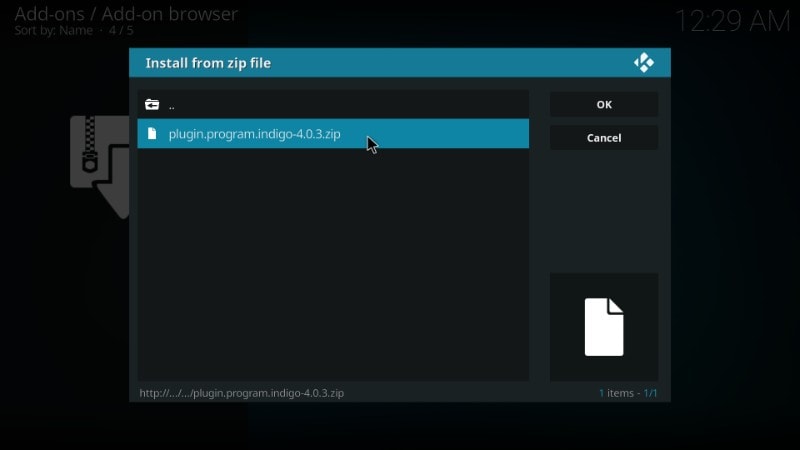
STEP 3: You should now see the zip file named plugin.program.indigo-4.0.3.zip. The numbers towards the end of the filename may change depending upon the version released. At the time of writing this article, it is 4.0.3.
Click this zip file.
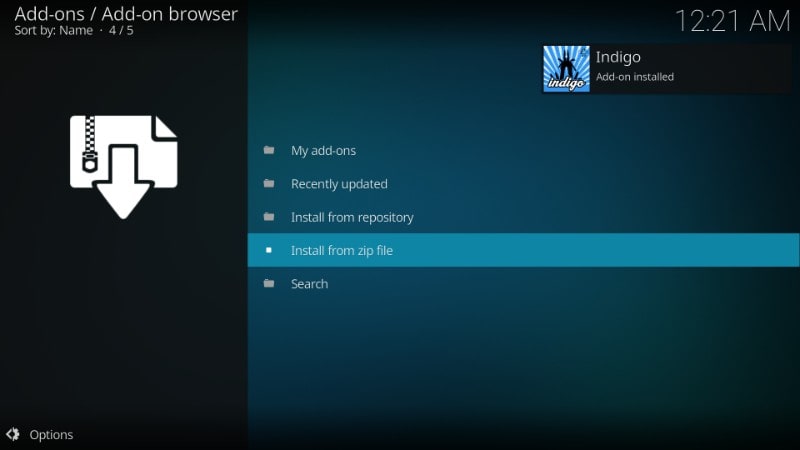
STEP 4: Now, wait for the ‘Indigo Add-on installed’ notification. This notification will appear on the top-right.
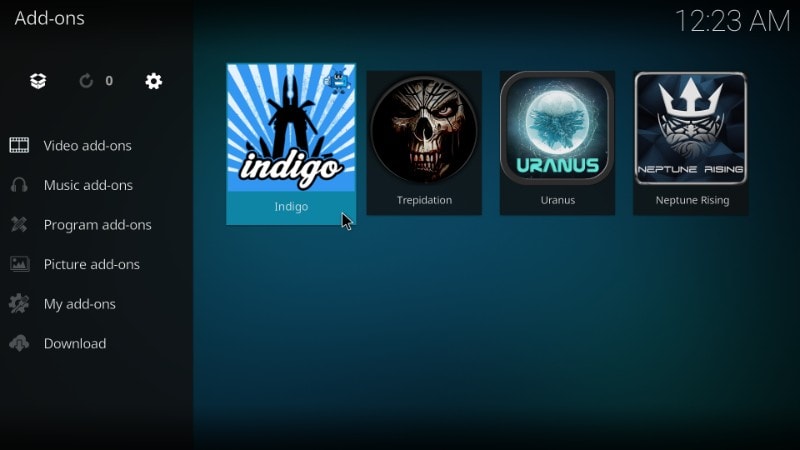
STEP 5: Return to Kodi home screen and navigate to Add-ons > Video Add-ons. You will find Indigo on the list of the addons.
You can also access Indigo from Add-ons > Program Add-ons as Indigo is also a maintenance and utility tool.
How to Use Indigo Addon Installer Tool
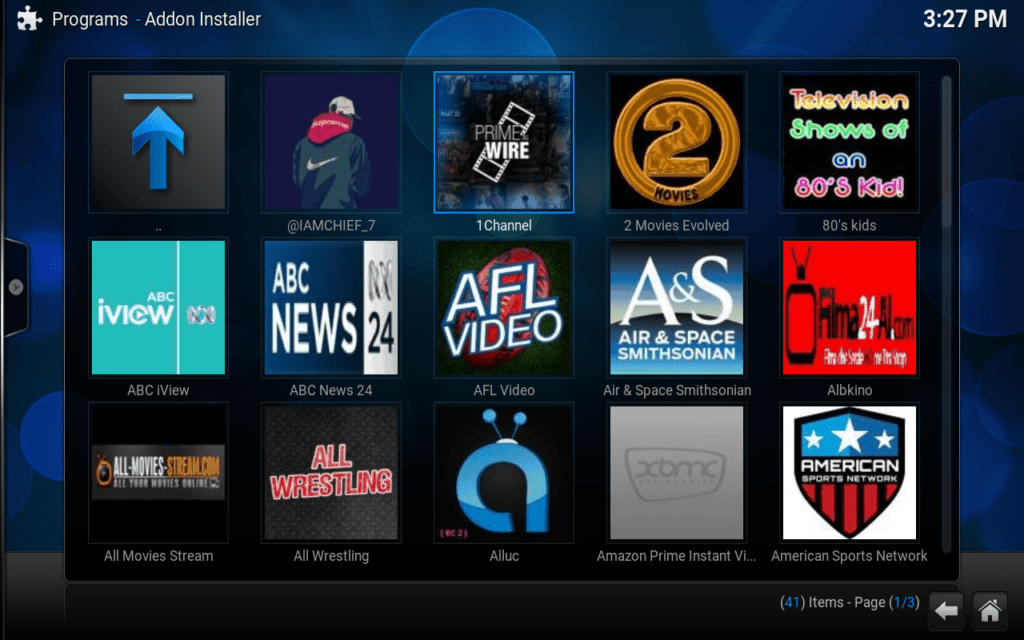
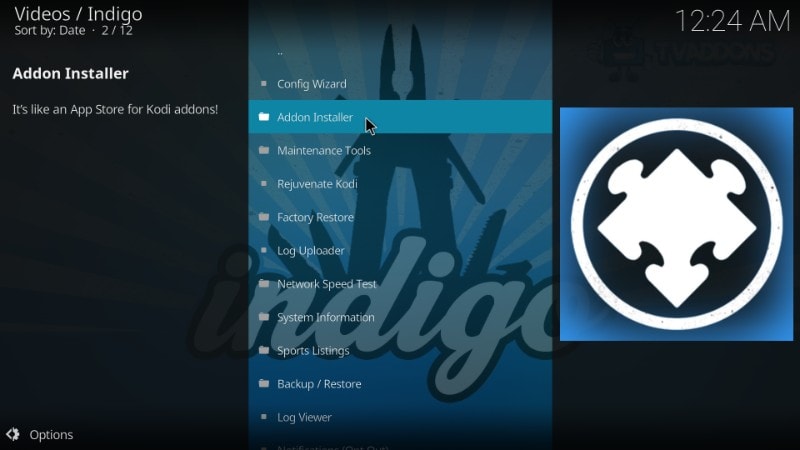
Open ‘Indigo’ from the Add-ons section. As you can see in the image below, Indigo offers a number of features and options. It has the Config Wizard, Addon Installer, Maintenance Tools and a lot more.
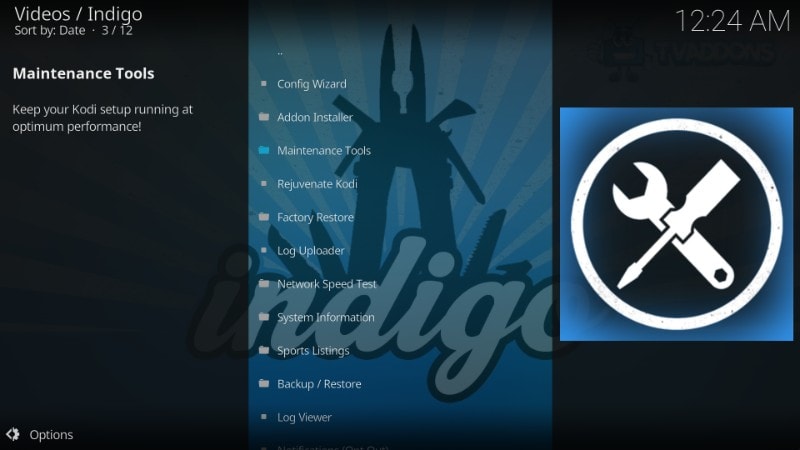
As ‘Addon Installer’ is the most popular option, we will take a look at it. Click ‘Addon Installer’ on the list of the available options
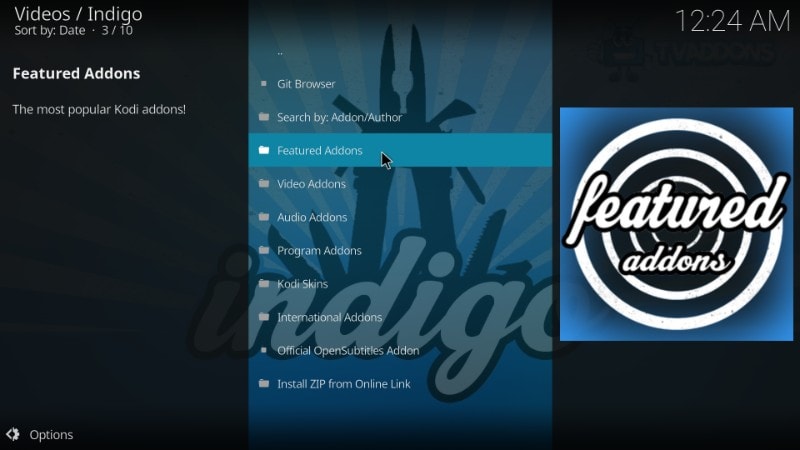
Indigo gives you several options to install the addons as is evident in the image below. ‘Featured Addons’ shows the most downloaded addons first. You can also explore addons by categories such as Video Addons, Audio Addons, Program Addons, etc.
Go ahead and open any option you like and explore it further.
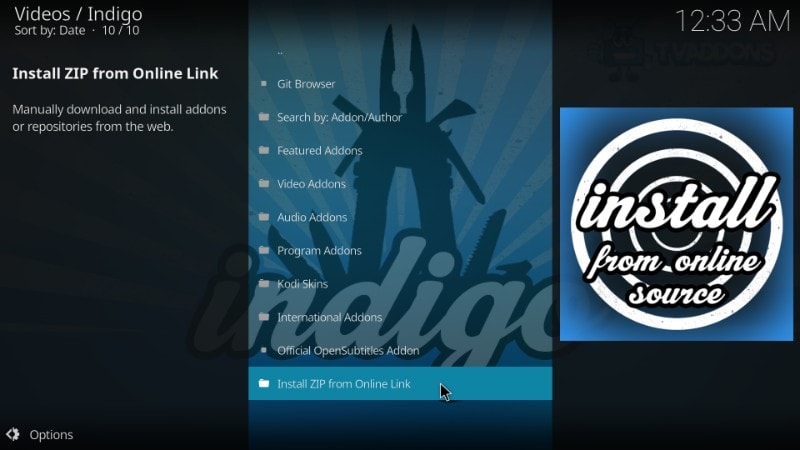
Indigo also allows you to install any addon that is not available in its library. What you need is a link to the zip file. Click the ‘Install Zip from Online Link’ option and enter the URL of the zip file. Indigo will install the addon without any hassles.
That’s pretty much it about the Indigo addon. Let us now explore the Fusion installer further.
How to Install Repositories using Fusion on Kodi
Indigo isn’t the only add-on you can install through Fusion. In fact, Fusion has a huge collection of all kinds of repositories. I will now show you how to access Fusion’s library of repos and how to install them.
When you are on the Kodi home-screen, open Add-ons and click ‘Package Installer’ icon on the top-left. Now, click ‘Install from zip file.’ Next, click ‘Fusion’ source that we added earlier. As already, discussed, you will see the following three options.
This time, click ‘kodi-repos’. This is the place where all the Fusion repositories reside.
Kodi-repos is further divided into three categories:
- English
- International
- Xxx-adult
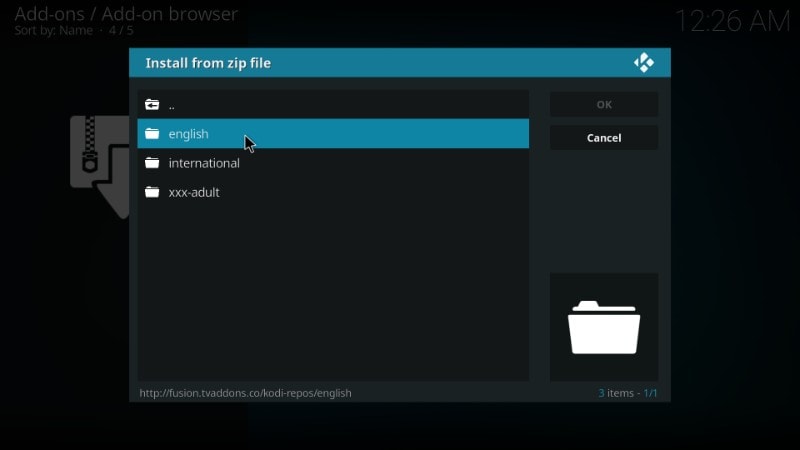
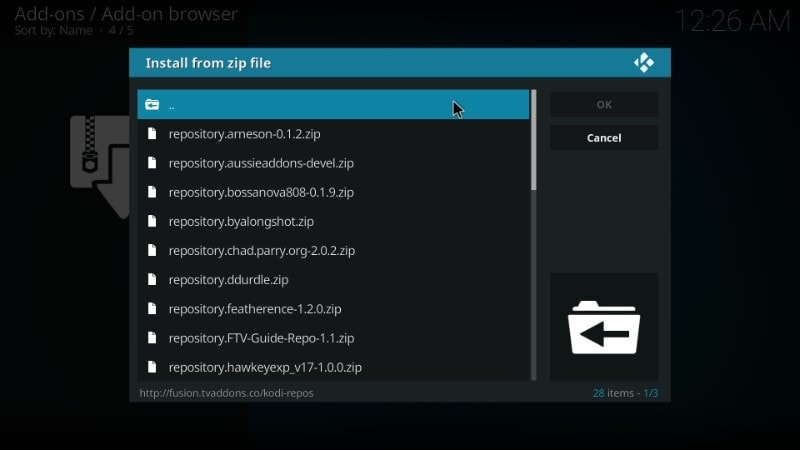
You can explore the relevant repositories in each category. For instance, click ‘English’ and you will see the list of all the available repositories in the English language
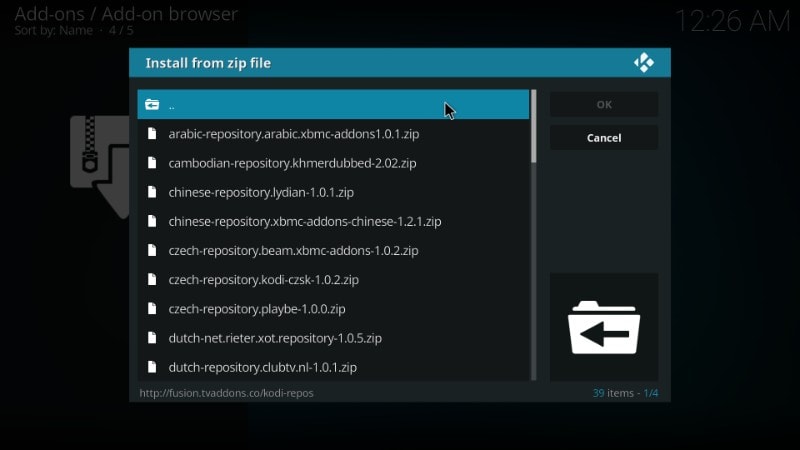
In the same way, when you click ‘International’, you will find all the repos in the International languages.
Click the zip file of the repository you wish to install and Fusion will install it on Kodi for you.
Conclusion
Adding Fusion to Kodi appears like a good concept to me. It has worked out quite well for me undoubtedly. I can obtain a lot of the addons I need via one of the repositories Blend hosts. I have also installed Indigo addon and it allows me mount any type of addon I want that is not the component of Fusion collection. Fusion for Kodi is especially suggested to those that keep setting up addons consistently. I wish this article was helpful to you. If you have any type of concerns or comments regarding Combination Kodi, do not hesitate to allow me know with the comments area listed below.