


NTOSKRNL.exe file is a kernel image that is accountable for lots of systems based processes like Hardware Virtualization, Process, and Memory. Among these, it is also responsible for compressing the old pages of memory, which minimizes the general amount of memory being used.
There are opportunities that if your computer system is running gradually and you discover NTOSKRNL.exe gobbling up on your resources like CPU Usage, Disk Usage, and Memory Usage, then you need to have a look at few things. Usually, this process utilizes less than 30% of CPU, but in case that is constantly up, then this post will assist you.
[Fixed] NTOSKRNL.exe high CPU, Memory & Disk usage problem
In this article, you can know about how to fix ntoskrnl here are the details below;
NTOSKRNL.exe high CPU, Memory & Disk usage
1] Scan your computer for potential malware
There might be a likelihood that your computer system might be contaminated with malware. And this malware might be related to the NTOSKRNL.exe file and, for this reason, making it consume a lot of system resources. So, I would actually recommend you to make certain that your Antivirus depends on the date and after that, scan your computer system with it, specifically the C: \ Windows \ System32 folder due to the fact that this is the place where the NTOSKRNL.exe file is located.
2] Remove incompatible programs
Setting up and running incompatible programs may likewise trigger such unusual habits with system files. There might be instances when carrying out a specific sub-task within a significant task. Hence, they might be stuck in some sort of loop and end in grabbing all of as much as the system resources. Thus, it is advised to uninstall such software applications and inspect if the problem is repaired or not.
3] Run DISM Command
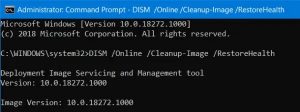

When you run DISM (Deployment Imaging and Servicing Managemen) tool, it will repair the Windows System Image and Windows Component Store in Windows 10. All of the system inconsistencies and corruption ought to be repaired. You can either use Powershell or command trigger to perform this command.
4] Stop the Runtime Broker procedure
RuntimeBroker.exe screens access to Windows API’s and ensure that apps do not violate the core security of Windows. RuntimeBroker.exe generally leaves an extremely small footprint. In many cases, RuntimeBroker.exe might consume more resources but does not release memory after the work is done, leading to a memory leak. This impacts NTOSKRNL.exe.
Press Ctrl+ Shift+ Esc to open the Task Manager. Locate Runtime Broker under the Processes tab. If it’s using more than 15% of your memory, you probably have a problem with an app on your PC. In this case, you require to stop the Runtime Broker procedure. Select it, right-click on it, and then click on End Task.
5] Update your Drivers
The incompatibility between the Operating System and the Driver may also trigger problems like this. So, you can attempt to Update your motorists. You can also attempt to Update your copy of Windows 10. This will assist you in repairing any bad sectors produced by any intendedly or unintendedly carried out the job on the computer system. Hence, keeping Windows 10 as much as date constantly is extremely recommended as it repairs the possibilities of a lot of errors.
6] Run Performance Troubleshooter ntoskrnl
- Open Run box, type the following and hit Enter:
- msdt.exe/ id PerformanceDiagnostic
- This starts the Performance Troubleshooter. Run it and see if it has any issues to fix.
- You might also adjust Windows for best performance and see if that works for you.
7] Fix in Clean Boot State ntoskrnl
You can troubleshoot further manually by carrying out a Clean Boot. A Clean Boot starts a system with very little chauffeurs and startup programs. When you begin the computer system in tidy boot, the computer begins by utilizing a pre-selected very little set of motorists and startup programs, and due to the fact that the computer system starts with a minimal set of motorists, some programs might not work as you anticipated.
Clean-boot troubleshooting is created to separate a performance issue. To carry out clean-boot troubleshooting, you need to disable or enable one process at a time, and after that, reboot the computer after each action. If the problem goes away, you understand that it was the last procedure that was creating the problem.
8] Usage Windows Performance Toolkit to find the origin
You may need to use the Windows Performance Toolkit to discover the origin of this problem. Open Command Prompt by looking for cmd in the Cortana search box or hit WINKEY+R to release the Run energy and type cmd and hit Enter.
Now, key in the following command, and struck Enter:
xperf -on latency -stackwalk profile -buffersize 1024 -MaxFile 256 -FileMode Circular & & timeout -1 & & xperf -d cpuusage.etl
Await a minimum of 60 seconds for this command to run. Now inspect the logs of this Windows Performance Toolkit. They are save in a file call cpuusage.etl in the C: \ Windows \ System32 folder. This will note all the reasons for this System Resources being gobbled up.
Check out over other articles like:
- 100% Solved File System Error 2147219196 in Photos or Other Store Apps
- 100 % Fixed Avast UI Failed To Load Error [Working- 2020]
- Picktorrent Proxy Mirror Sites Unblocked Picktorrent Alternatives
- {Solved} “System Thread Exception Not Handled” Error on Windows 10
- IAStoricon.exe Delayed Launcher and How to Disable it