


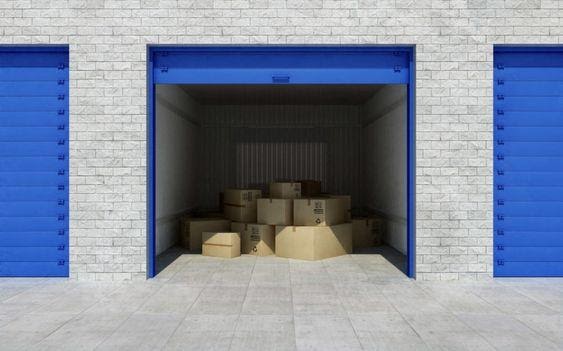
Organizing your storage unit efficiently will take up lots of time and effort, but it will definitely pay off in the end! With our pro storage tips, get ready to tackle your Brighton self storage in a heartbeat!
Whether you’re a business owner renting storage for inventory or involved with software development outsourcing and using space for your devices, keeping the unit organized is key!
Don’t worry, you won’t have to go all Marie-Kondo with your belongings! Just follow these 10 simple tips stored to strategize and organize your storage unit and save yourself from unnecessary stress later on.
1. Create an inventory
Large items such as sofas might be easy to remember, but you can’t possibly remember each and every decoration piece or electronic that you haven’t seen in months (or even years!).
Create a detailed list of all the items you place in your London self storage. Be as detailed as possible and include monetary values of expensive items in case they get lost in the process. Make a spreadsheet or just note everything down on your notebook – whatever suits you!
Don’t forget to maintain that list and add/subtract items if you put them in or take them out of the storage units!
2. Pick the same size boxes
You don’t want to be fitting in and stacking unevenly sized boxes. Your boxes will likely topple over, damaging everything inside. Therefore, picking the same size of boxes will help with the stacking process and accessibility.
While you might be tempted to get all large sized boxes, remember that they are difficult to remove out of a pile, especially if they are placed at the bottom.
Also, be careful to not store too many items in one box – even if you think the box is big enough and can hold the weight. It will lose shape gradually and your belongings will likely be damaged.
3. Take apart what you can
Before placing large pieces of furniture in storage, disassemble them and break them down into smaller pieces. This might sound like a lot of work but you’ll be thanking us later!
Take apart the headboard and bed frame before placing a bed into storage. Similarly, disassemble the legs of chairs and tables. Once it’s dismantled, the moving process will become easier and you can conveniently fit in everything into the storage units.
Bonus tip: if furniture – such as the dining table and dresser – doesn’t disassemble, use the drawers and shelving as extra space for your storage!
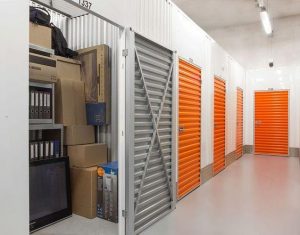
4. Use clear plastic bins
While packing up stuff, we all tend to put them in cardboard boxes. This time, consider getting some clear bins made of plastic. Plastic bins will make it much easier for you to keep track of what items are placed in each box.
Any time you want to get that red scarf or the china dinner set, it will be so much more convenient for you to locate and retrieve it.
In addition to making everything visible, they will also protect your belongings from extra moisture and dirt. With a 2-in-1 solution to your storage dilemmas, they’re definitely worth the few extra pounds!
5. Use pallets
Protecting your belongings from damage should be your number one priority!
Many at times, something can spill or leak from within the boxes. You don’t want your belongings, especially something as expensive as furniture, getting damp and growing mould.
Here is where pallets come to your rescue! Wooden and plastic pallets keep all the items off the ground. Use them to lift all your belongings up a bit so they’re not vulnerable to any kind of spills and you can collect them in the same condition you left them in!
6. Organise by priority
You need your Christmas bakeware so you reach the storage unit in freezing temperatures. You start digging through the boxes but it’s been two hours, half your belongings are hanging outside and you still haven’t found what you needed. Can you imagine the frustration?
Keeping your storage units organised is all about prioritizing to avoid situations exactly like these!
Use the inventory list you made and highlight all the items you’ll be needing frequently. Then, strategically place all these items in the front. You’re sure to need the seasonal clothes and office documents so, keep them in an easy-to-reach spot near the door.
Also, place the larger and heavier items into the back and the bottom of the storage units. Place lighter items on top so they don’t get crushed or damaged.
7. Label everything
Labelling is very important – even if your stuff is in clear bins!
Label each box and bin that goes into the storage Brighton space. Remember to use a permanent marker to label so it won’t fade away over time – you don’t want to waste your hard work.
Be specific in labelling your boxes. If you use labels such as ‘kitchen’, you’ll probably end up confused with six kitchen boxes. So, use simple list of contents such as ‘dinner set, cutlery, pantry’ etc.
8. Go vertical
What if you have too much stuff but you can’t afford to upgrade to a bigger size unit? Seek out clever tricks to maximize the space in the storage units that you do have!

Start at the bottom and stack the boxes up high to make the most out of the vertical space. But make sure the stack is balanced to keep everything from falling over! Also remember to put the heavier boxes at the bottom and the lightest items on the top.
Take advantage of that extra storage space! You’re paying for every inch of space in the storage units, so why not utilize it?
9. Place shelving units
A storage organising trick you wouldn’t have thought about! If you’re not too fond of stacking boxes on top of each other, you can consider incorporating shelves into the storage units.
From drilling in hanging shelves to getting metal standing shelving for extra storage, there are so many ways you can use shelving in your storage units.
Install a good-quality shelving unit on one wall and keep all your frequently used items on it. An ideal long-term storage solution! And remember, anything that can’t fit in the boxes, place it on the shelves!
10. Create a layout
Plan ahead of time and build an organised map as to where exactly each item is located inside the storage unit. For example, the shoes are to the left of the unit, in the bottom box.
Also make sure to plan a pathway throughout the unit. You’ll be making everything worse if you continue to load all your boxes till the front of the unit. It is ideal to leave some space in the middle to create a small pathway from where you can access all corners of the unit.
Once you’ve made the map, tape it to the unit wall for easier navigation, so every time you need to get something out of the storage units, you won’t have to go through a treasure hunt.
Find exactly what you need in just a few minutes!