


As an editor, one of the important things you have to know is how to sync video to the music beat. One of the easiest examples for this usage scenario is music videos. But even you are working on any other projects, like a wedding video or a short video which will be posted in social media, syncing those shots with the beat is essential to step up your final output.
The first thing you need to edit a video is a video editing software. Yes, there are a lot to choose from, but most of the software comes with a huge learning curve or is paid. Most of the editors who are starting out or just trying out editing, do not want to pay and also want a hassle-free experience. So if you are looking for the solution, Filmora9 Video Editor is one of the best video editors around.
Introduction to Filmora9
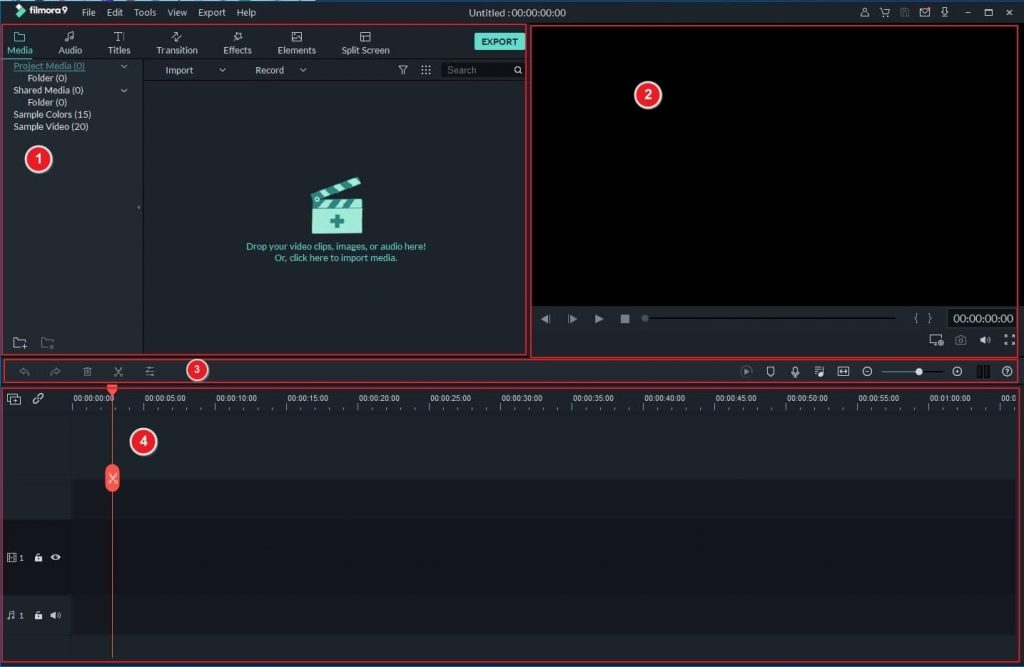
It does not matter if you are a beginner or have a huge experience in video editing, Filmora9 has everything you can ask for. Fortunately, the software is really easy to pick up for anyone.
First of all the user interface is well organized, so you will be able to find every option you are looking for a single click away. If you are working on a big project, Filmora9 can handle up to 100 audio and video layers, which is way too much.

Filmora9 features plentiful pre-programmed video effects, filters, overlays, elements, and transitions, as well as a royalty-free audio library which includes music and sound effects. Besides, you can download more in the online effects store Filmstocks.

On the other hand, if you have some work related to effects, this piece of software can handle that with ease. From green screen removal to noise reduction, everything is baked into Filmora9. You can also fix common problems like camera shake, and add effects like slow motion and reverse.
The software has support for videos up to 4K. For the pros out there who are working with a lot of 4K footage, in case your computer is struggling to compete with your pace, Filmora9 allows you to create proxy files, adjust preview quality or render the video, which will help you to be more productive.
Another important aspect of video editing is color grading. If you grade your footage properly, it will be the cherry on the top and make your videos look way to professional. To do that, Filmora9 has many pre-made LUTs to kick start your workflow and then you can fine-tune those to create the perfect look depending on your footage.


Finally, if you just installed the software and wondering from where to start, Filmora9 has a dedicated support center to help; also there are some useful video tutorials in the software to help you get started quickly.
How to Sync Video to Music Beat in Filmora9
So let us focus on how you can beat sync your video with Filmora9. There are certain steps to follow but those are extremely easy to understand.
1. Add Background Music
To sync the beat of course you need music. Remember that background music can make or break the flow of your video. First, click on the Import button above the Media Library panel to browse for audio files in your computer. Then from the new window, select the song or music file you want in your project and import it on the project.
Or you can browse the music in-built in Filmora9 Audio Library and choose the proper one.
2. Beat Detection
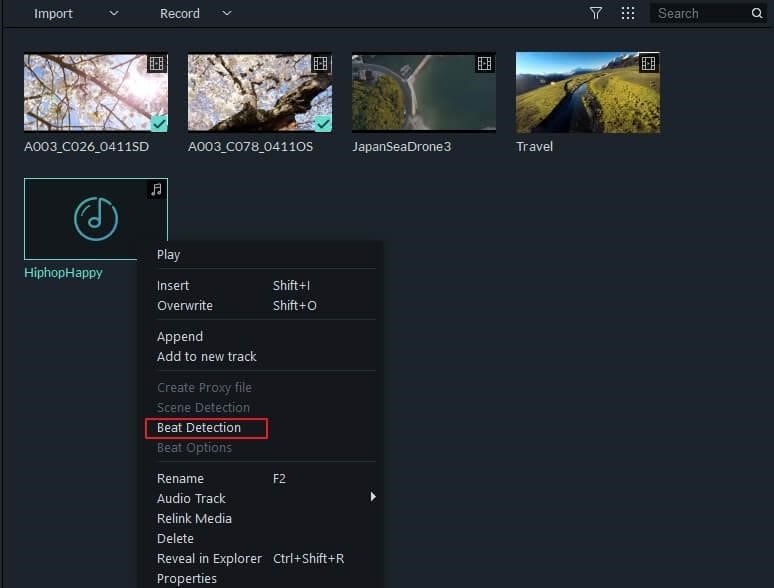

Although you can manually understand the flow of the music, sometimes it gets tricky. In that scenario, you can use the Beat Detection feature in Filmora9. It will also save you time in the long run. To do that right-click on the music file in media library and select Beat Detection. Remember that when the feature is used for the first time it will take some time.
Then drag and drop the music file to the timeline and it will be presented with the beat markers in red for every four beats.
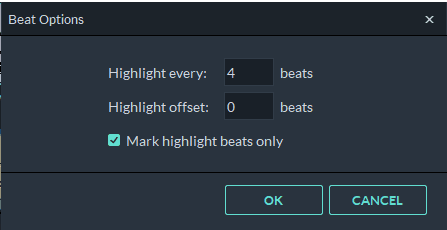
3. Beat Options
If you want the markers to be placed in any other structure, right-click on the audio track from the library and click Beat Options. A pop-up window will appear where you can change how you want the markers to be and if there is any offset needed.

If you want to add manual markers just move the play-head on the right position and press M. To delete any markers, click on the red marker and press Delete. By any chance, if you want to remove all the markers, select the Delete All Markers option.
4. De-Noise
If you are using recorded audio for editing, most of the time there will be some kind of noise in the background. To remove that double click on the audio clip in the timeline panel to open the Audio adjustment window. Then check the Remove background noise box. If the processing is too high or low you can manually adjust it by dragging the slider.
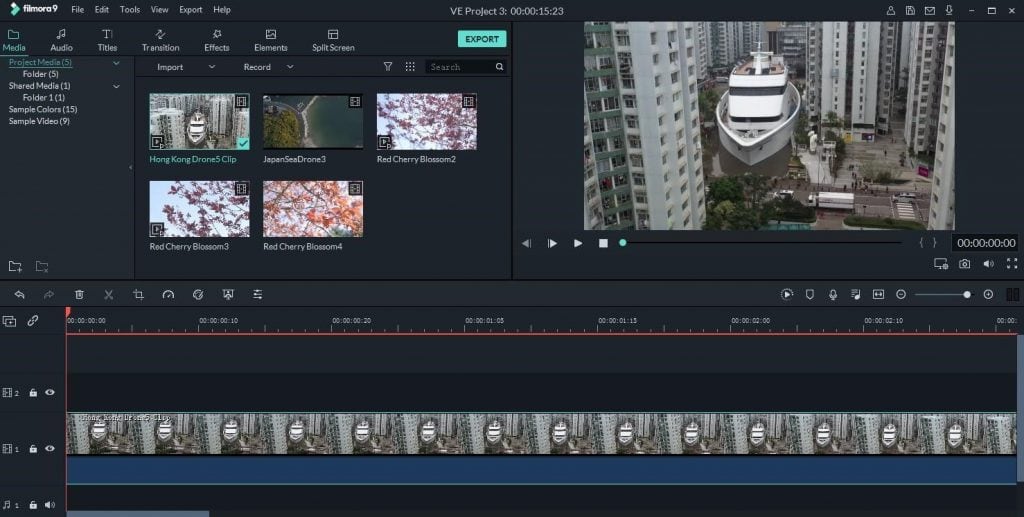
5. Edit Your Footage
Now you are all set to start editing the project. Simply add the video files on Media Library and drag and drop those to the timeline. Now you have all the things to create your masterpiece and those red markers will guide you.


6. Other Useful Options
Assuming you are new on Filmora9 there are some extra steps I want to mention which might come in handy for you.
First of all, if you want to split the audio clip somewhere, just move your play-head on that position. Then press right click and press Split.
Then you can adjust your audio levels. To do that, double click on it and it will open a panel with adjustment sliders for volume and pitch. There are also options for fading in or out the audio.
Most likely there will be an audio clip attached with the video clip you will import. To mute that right-click on the audio layer from timeline and press Mute. To completely remove that first you will have to right-click on it and select Detach Audio. Then you can simply press Delete to remove it.
To add extra audio layers, click the Plus icon in the left upper corner of the timeline and then select Add Audio Track. To add video layers, the procedure is the same.
To adjust the tempo of the audio file right click on the audio file and select Speed and Duration. Then change the value to your liking.
Wrapping Up
If you follow these steps carefully, synchronizing your footage with the audio beat will be easy. Especially the Beat Detector option will save a lot of time and hustle from your workflow. Now it is your time to play your masterstroke.